
Halo 3 ODST (Mission 2) Mombasa Streets Walkthrough

Video Walkthrough: N/A
The first mission that you have control of your character during is Mission 2, Mombasa Streets. How this mission works is going to be a lot different than all of the other missions in this game and different than every Halo game before it. For this mission you are tasked with finding your squad mates, to do this you'll have to travel around Mombasa and find various clues for each squad mate.
Each time you find one of these clues you'll be thrown into a mission where you control a different squad mate and essentially find out what happened to them. After you complete the mission where you control your squad mate, you'll be thrown back to your character in Mombasa Streets and you'll be tasked with finding another clue.
At the start of Mombasa Streets you will find yourself in a drop pod (pictured above). Once your character breaks out of that drop pod you will get an extensive tutorial about the VISR, map and various functionality that you have available in this game. For now all you should focus on doing is running around and fighting enemies as you go through the various tutorials.
You will eventually be told to contact the Superintendent and lead to a ringing pay phone. Interact with it and you will download some new information after which your Map will be available. Follow the tutorial instructions to learn how to use your map and this will update your quest and send you to Tayari Plaza nearby.
Important: Out of all the things you're taught in the tutorial the most important thing to remember is the buttons that allow you to track quest objectives on your HUD. On the Computer it's the Up and Down Arrows and on the Xbox it's Up and Down on the D-pad.
Now that we've got all of that out of the way exit out of this area through a door in the southeast. One tip that helps a lot in Mombasa Streets is to pay attention to the signs. They will say "Slow Down" when you're getting close to where you have to go and they will also have arrows pointing you towards your objective.
The first objective you need to find to advance this mission is the Recon Helmet which is wedged inside of a computer screen in a nearby building (pictured below).
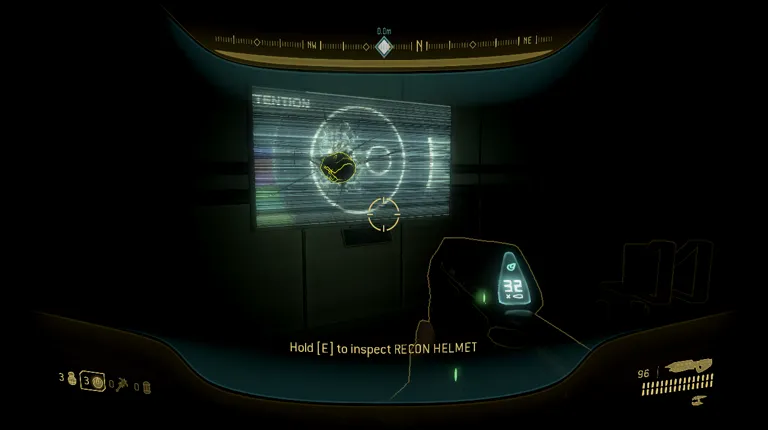
Find the Recon Helmet to begin the Tayari Plaza Mission.
For the rest of this mission I will only be providing you with pictures of the various objects that you need to find. In addition to these objects you can also find Audio Logs throughout the city which are ODST's version of Terminals, essentially they're just collectibles that will earn you Achievements when found. You can find a total of 29 Audio Logs on this mission and 1 on the Data Hive Mission.
Note: Some Audio Logs are only available as you progress further into the Mombasa Streets Mission. I recommend you use a guide dedicated solely to finding them if you are interested in collecting them.
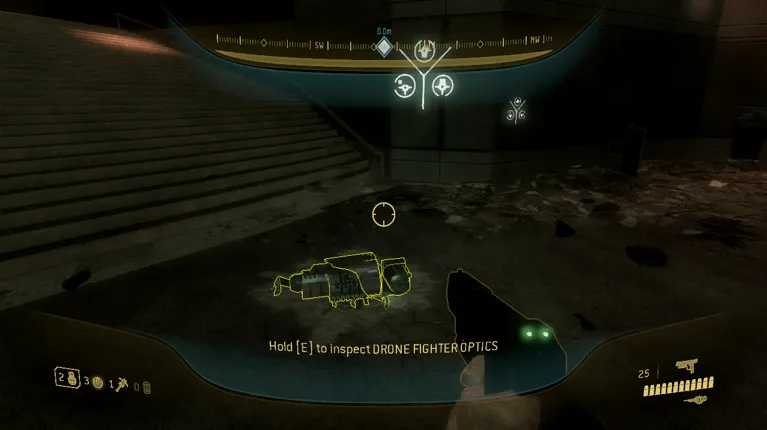
Find the Drone Fighteroptics to begin the Uplift Reserve Mission.
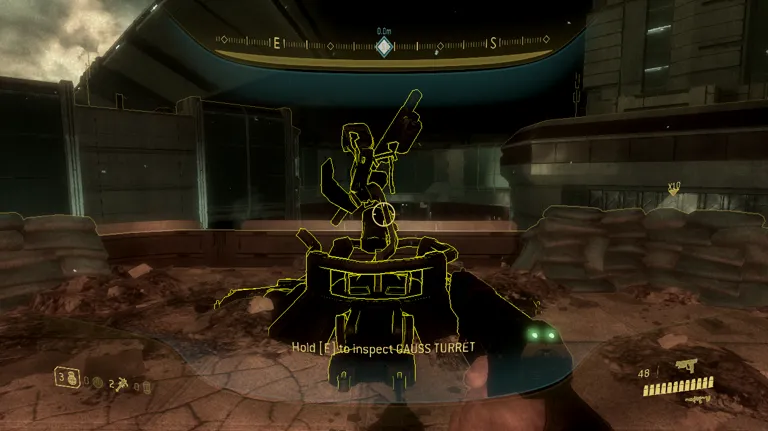
Find the Gauss Turret in Mombasa Streets to begin the Kizingo Boulevard Mission.
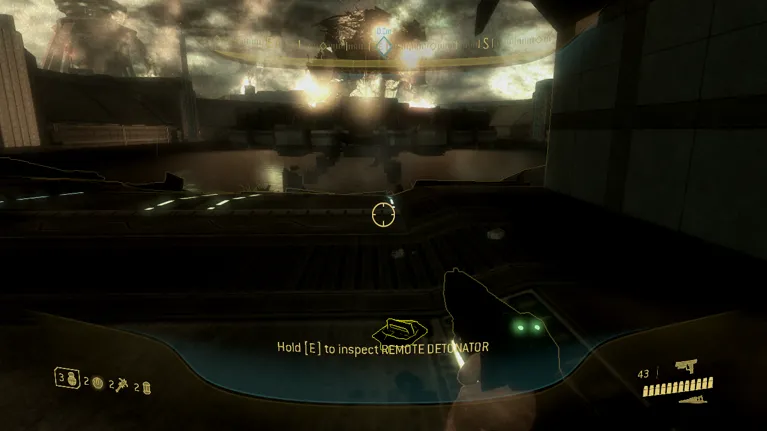
Find the Remote Detonator to begin the ONI Alpha Site Mission.
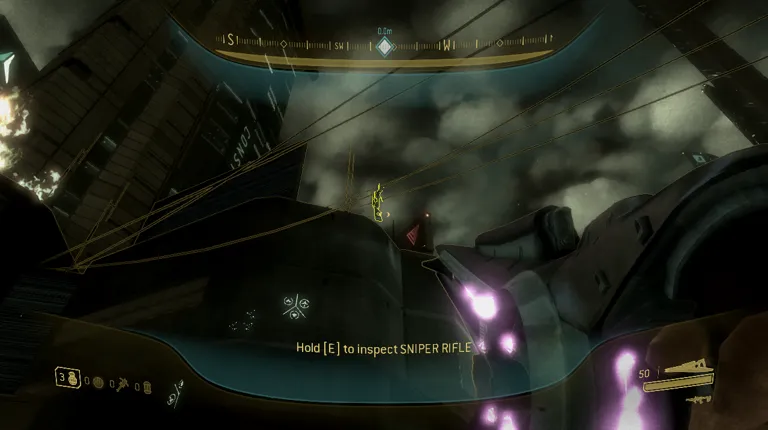
Find the Sniper Rifle to begin the NMPD HQ Mission.
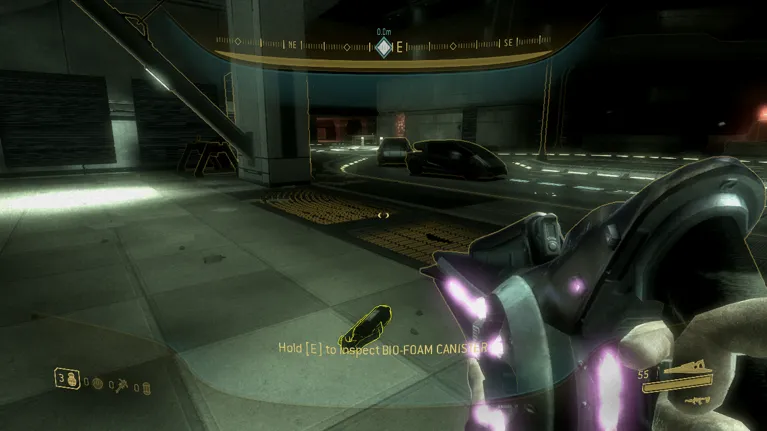
Find the Bio-Foam Canister to begin the Kikowani Station Mission.
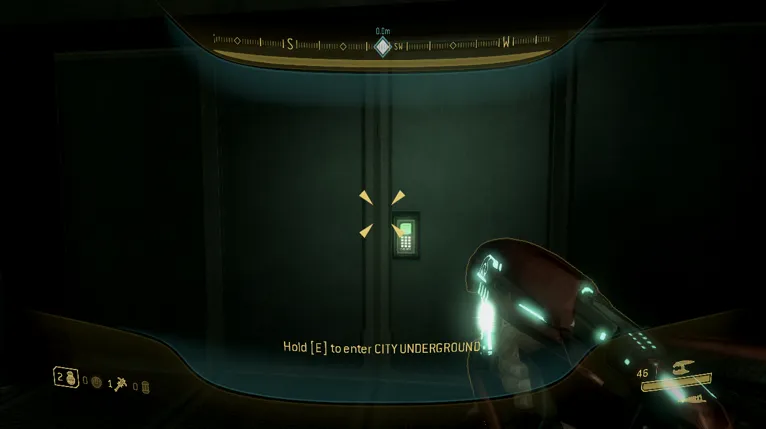
Find the entrance to City Underground to start the Data Hive Mission.
Continue to Mission 3: Tayari Plaza
Continue to Mission 4: Uplift Reserve
Continue to Mission 5: Kizingo Boulevard
Continue to Mission 6: ONI Alpha Site
Continue to Mission 7: NMPD HQ
Continue to Mission 8: Kikowani Station
Continue to Mission 9: Data Hive
Continue to Mission 10: Coastal Highway