
Halo 2 (Mission 5) Metropolis Walkthrough
Video Walkthrough: Halo 2 (Mission 5) Metropolis Walkthrough
Skull Location: Catch Skull Location
Terminal Location: Metropolis Terminal Location
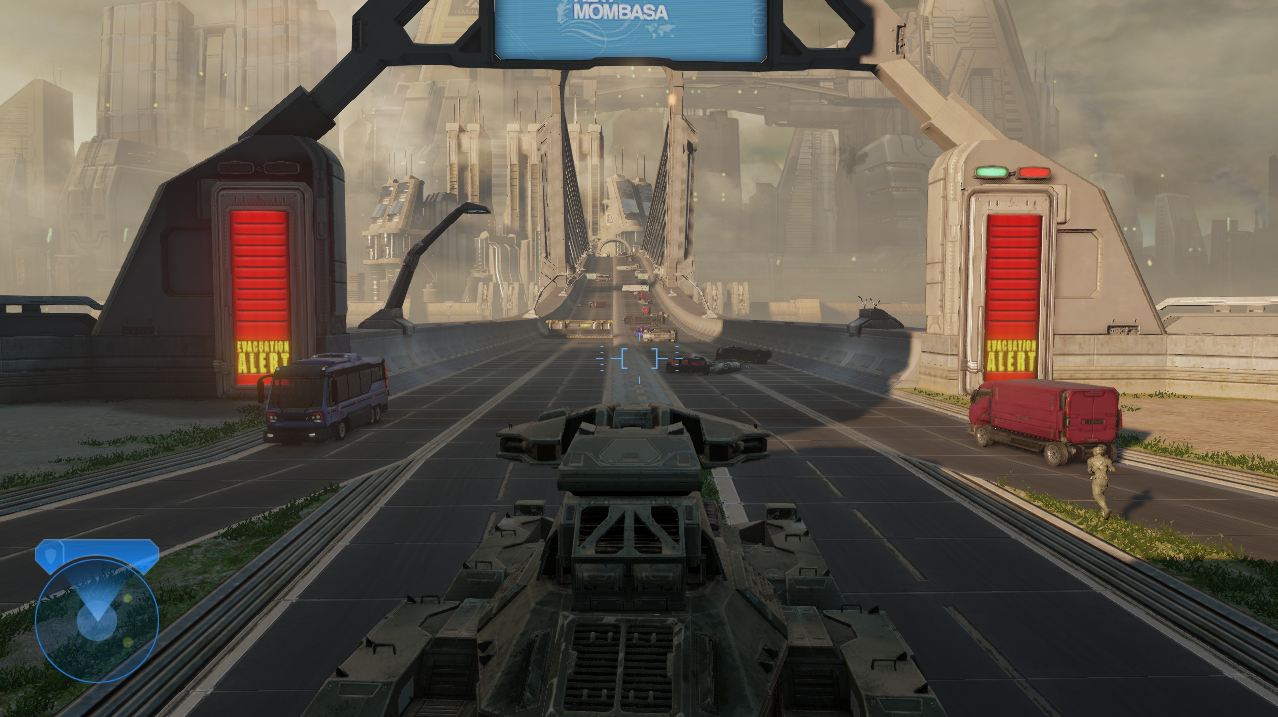
Metropolis is the next mission and this one is as linear as the previous. When you start this mission you're given a choice between a Scorpion Tank and a Warthog. Personally I take the Warthog but that's because I like to rush through the first half of this mission instead of dealing with all of the enemies.
When you take the Warthog you can dart past all of the enemies and you'll end up dealing with less enemies altogether since you drive by a couple of scripted events that would normally happen. Driving the Scorpion Tank will force you to deal with multiple Banshees and Wraiths when you reach the underground portion of the highway at the end of the bridge. This is the main difference between the two vehicles.
Inside the underground highway you'll find a blockade with a group of Marines waiting for you. One of them will offer you a Shotgun if you're interested - it's totally your call if you want it. As the Marine says, it's tight quarters up ahead but after that we're back out into the open.
After you clear out the Covenant in the underground highway portion go through the "pipes" to find an outside battle arena (picture below). The first thing you should do is approach the Jackal and assassinate him so that you can grab the Beam Rifle that he has.
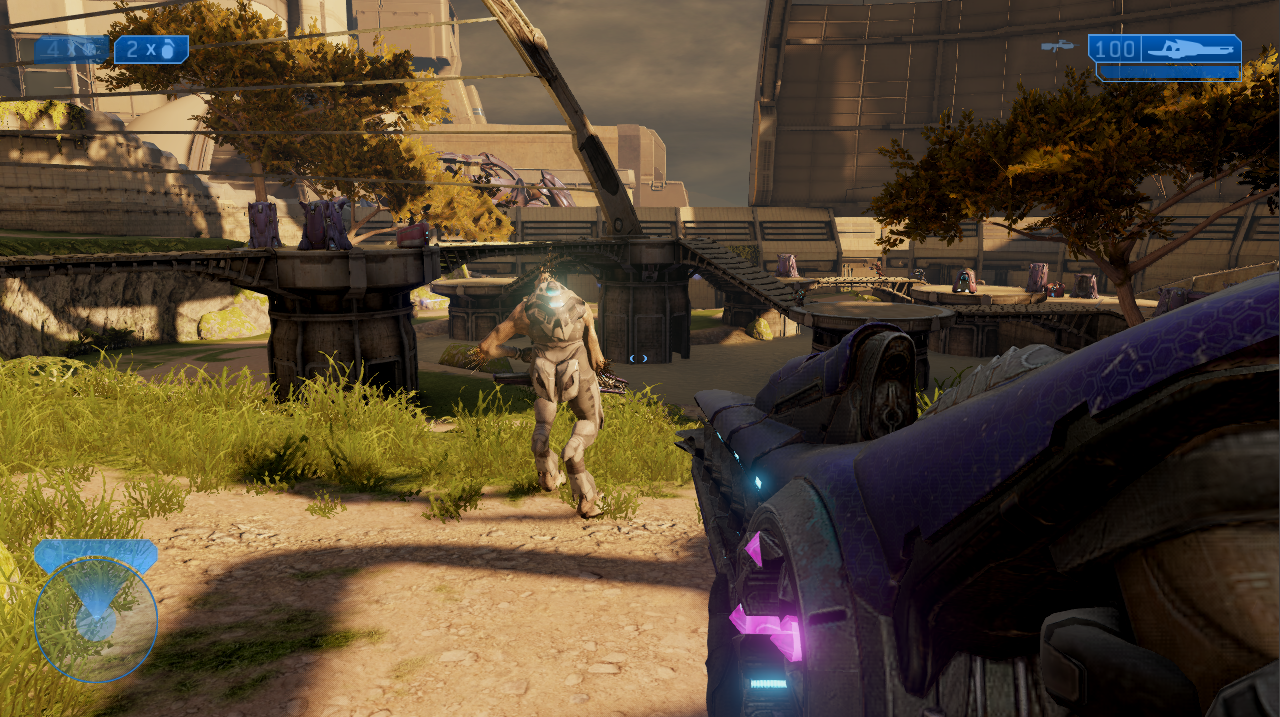
If the Beam Rifle falls to the ground or for whatever reason you can't grab it look around for a UNSC Sniper Rifle on the ledge nearby. Use your long range weapon to pick off as many enemies as you can before jumping down into the arena and grabbing a vehicle.
There is actually a Marine that drives around this arena in a Warthog if you'd like to hop on his gunner and give him a hand. He's actually a pretty good driver (sometimes) so it's a viable option if you're playing on Heroic or an easier difficulty. Once all Covenant are defeated in this first arena head through the gap in the wall to the second one.
Here you'll find more Covenant including a couple of Ghosts and a Wraith. Once you eliminate them head through the doorway that they all came out of - you'll find yourself in the final part of the mission which is a large city block. There will be a couple of Ghosts and Wraiths that you need to eliminate to advance the story in this area.
Once you've taken care of all the Covenant you'll be called into the nearby building by a group of Marines. A HUD will appear pointing you to where you need to go so don't worry about finding it. Inside you'll watch a scripted event involving a Scarab and then you'll have to mount and destroy it!
Run upstairs and you will find ammo and weapons lining the bridges - the Scarab will walk underneath them and you'll have to jump down onto the Scarab and kill all of the Covenant inside. It's up to you how long you want to wait before jumping onto the Scarab... You can pick off enemies from the safety of the bridges above until the very last minute then jump down... Or you can jump down immediately and go to town.
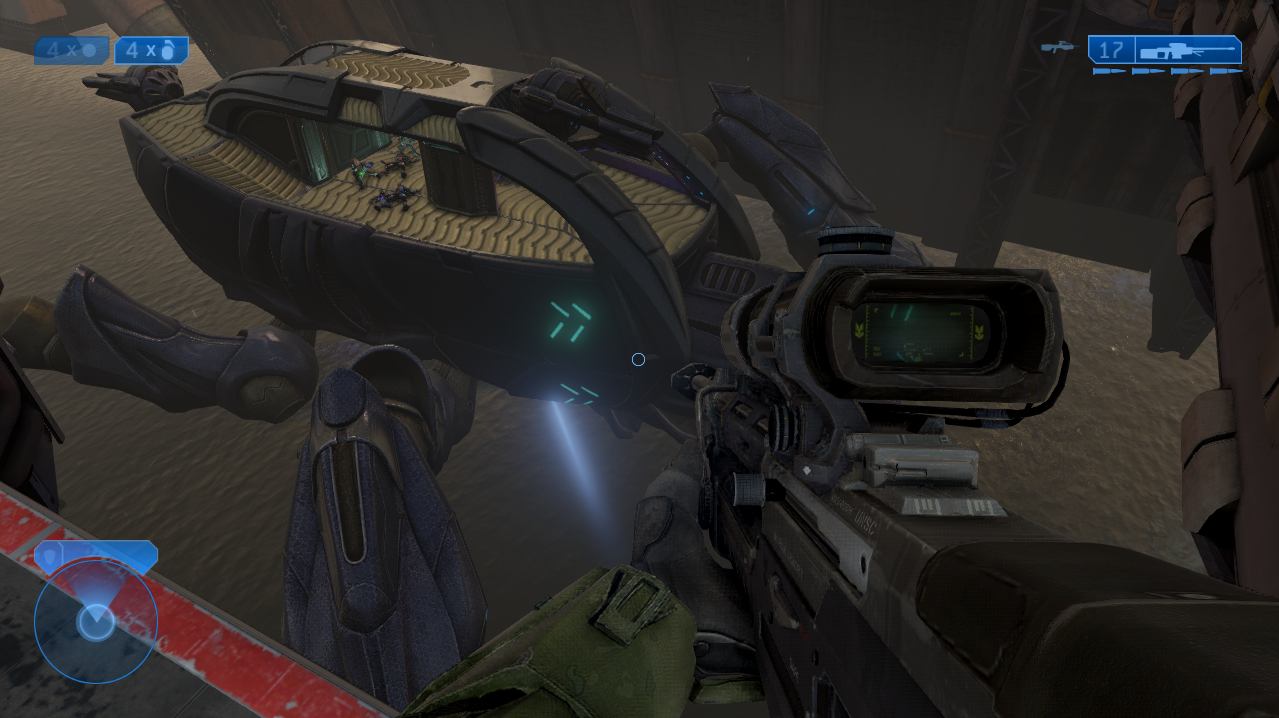
There will be about a dozen Elites you need to kill inside the Scarab - they will spawn and come out in waves one after another. Once you can safely get inside the Scarab you'll have a few more Elites to eliminate that are piloting it from the inside. After defeating all of the Elites you'll successfully complete the mission.
Continue to Mission 6: The Arbiter Walkthrough
Return to Mission 4: Outskirts Walkthrough