
Dorn's Companion Quest - Baldur's Gate 2
Dorn's Companion Quest begins when you speak with him in the Temple District of Athkatla and recruit him into your party. You can find Dorn standing outside of the High Hall of the Radiant Heart in the southeastern portion of the map, this building is also the first one you'll have to visit for his quest.
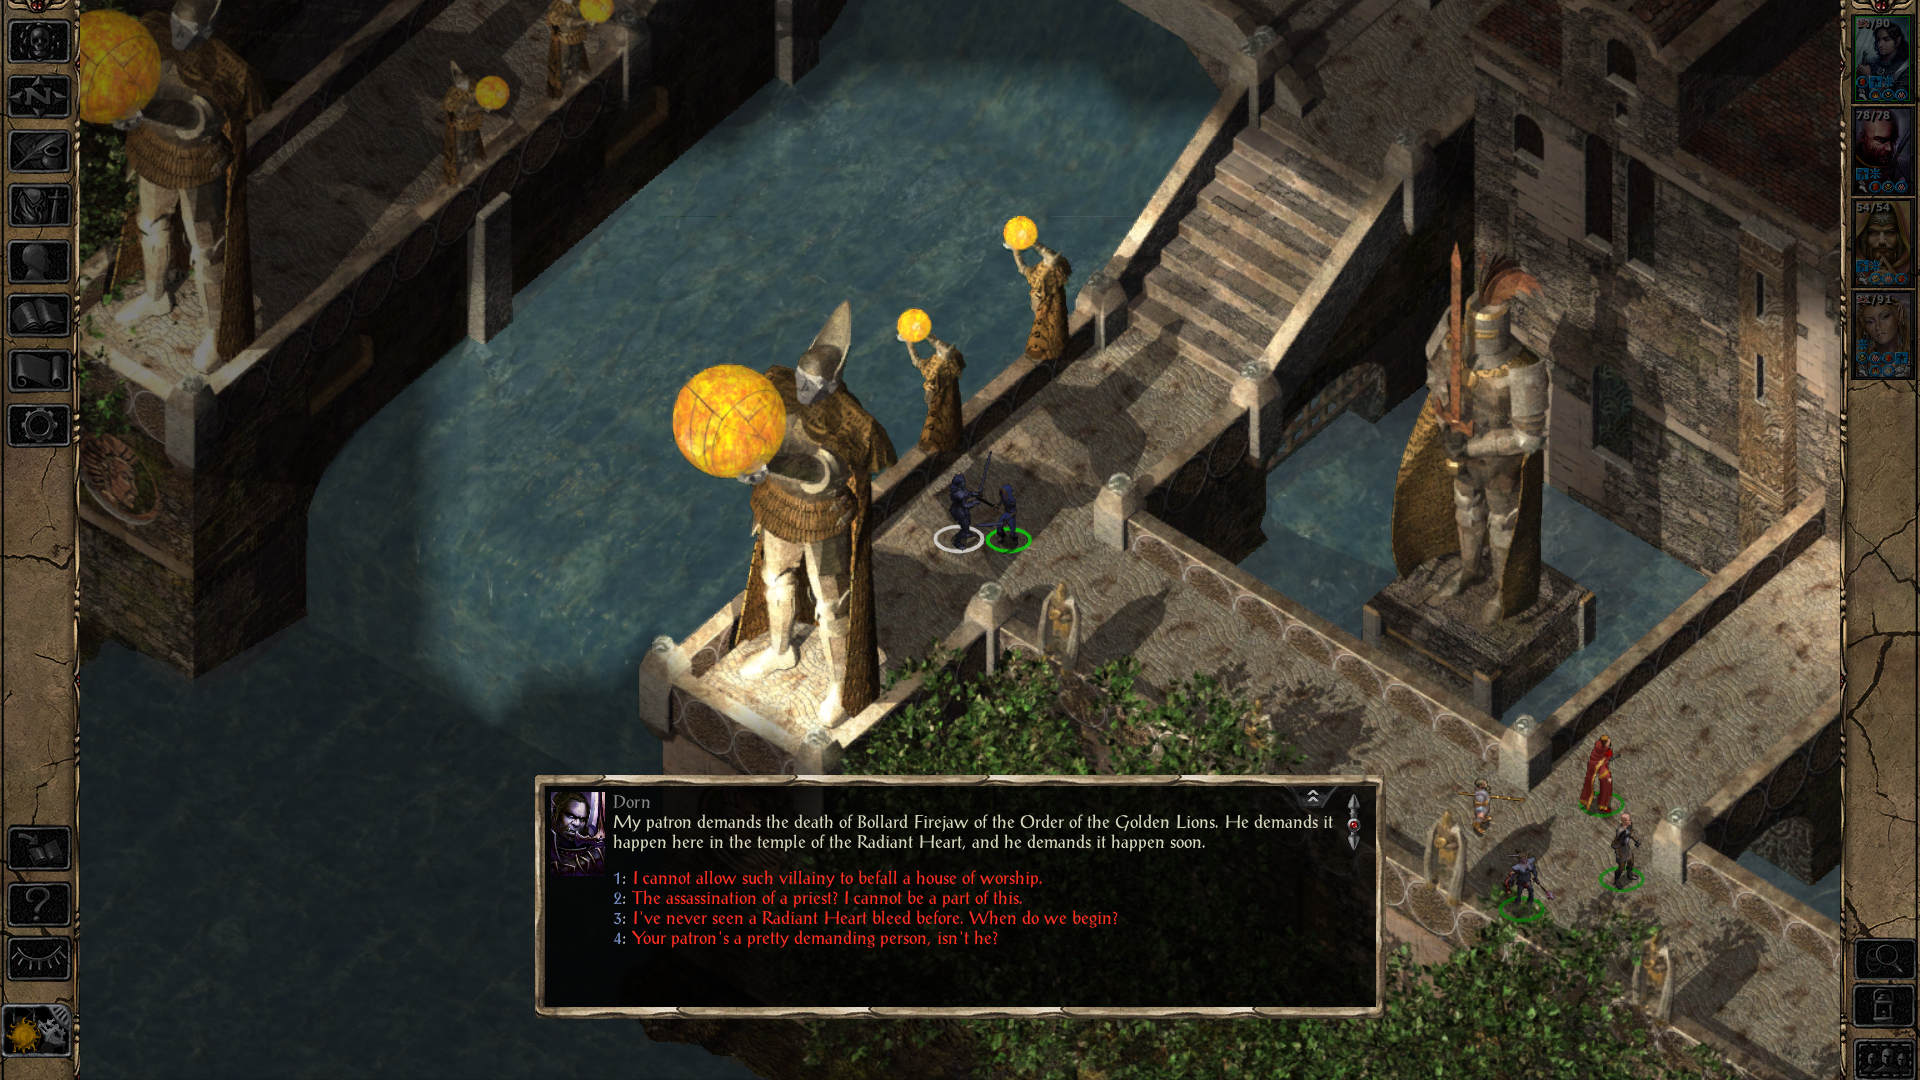
For the first part of Dorn's Bloody Path you'll need to enter the nearby building and interrupt the wedding taking place. It's worth noting that for the first part of this quest if you have Anomen or Keldorn in your party they will attack Dorn when they learn of what he is plotting.
Inside the Radiant Heart building you'll have a decent amount of dialogue and it doesn't matter what you choose for any of it. Your only goal is to assassinate Bollard Firejaw; you can technically kill everyone inside the building too if you wish but you should keep in mind that you may suffer Reputation hits if you do.
Once this event is finished you'll have to wait 6 days and until Dorn is level 12 or higher. Dorn will begin dialogue with you asking you to visit the Temple of Helm in the Temple District of Athkatla to speak with Guardian Telwyn. Much like before you'll be given the choice of killing Telwyn or letting him live - it's recommended you spare him since he's involved in other quests that take place in this district.
Guardian Telwyn will reveal the location of a Helmite Camp when you interrogate him, it'll be added to your World Map. Once you're done with Telwyn you'll want to Fast Travel to the Helmite Camp and kill everyone that's found here. I strongly recommend you take your time checking the loot and grabbing all of the goodies you want, Helm of the Noble will be one of the items dropped and is likely an upgrade for your party.
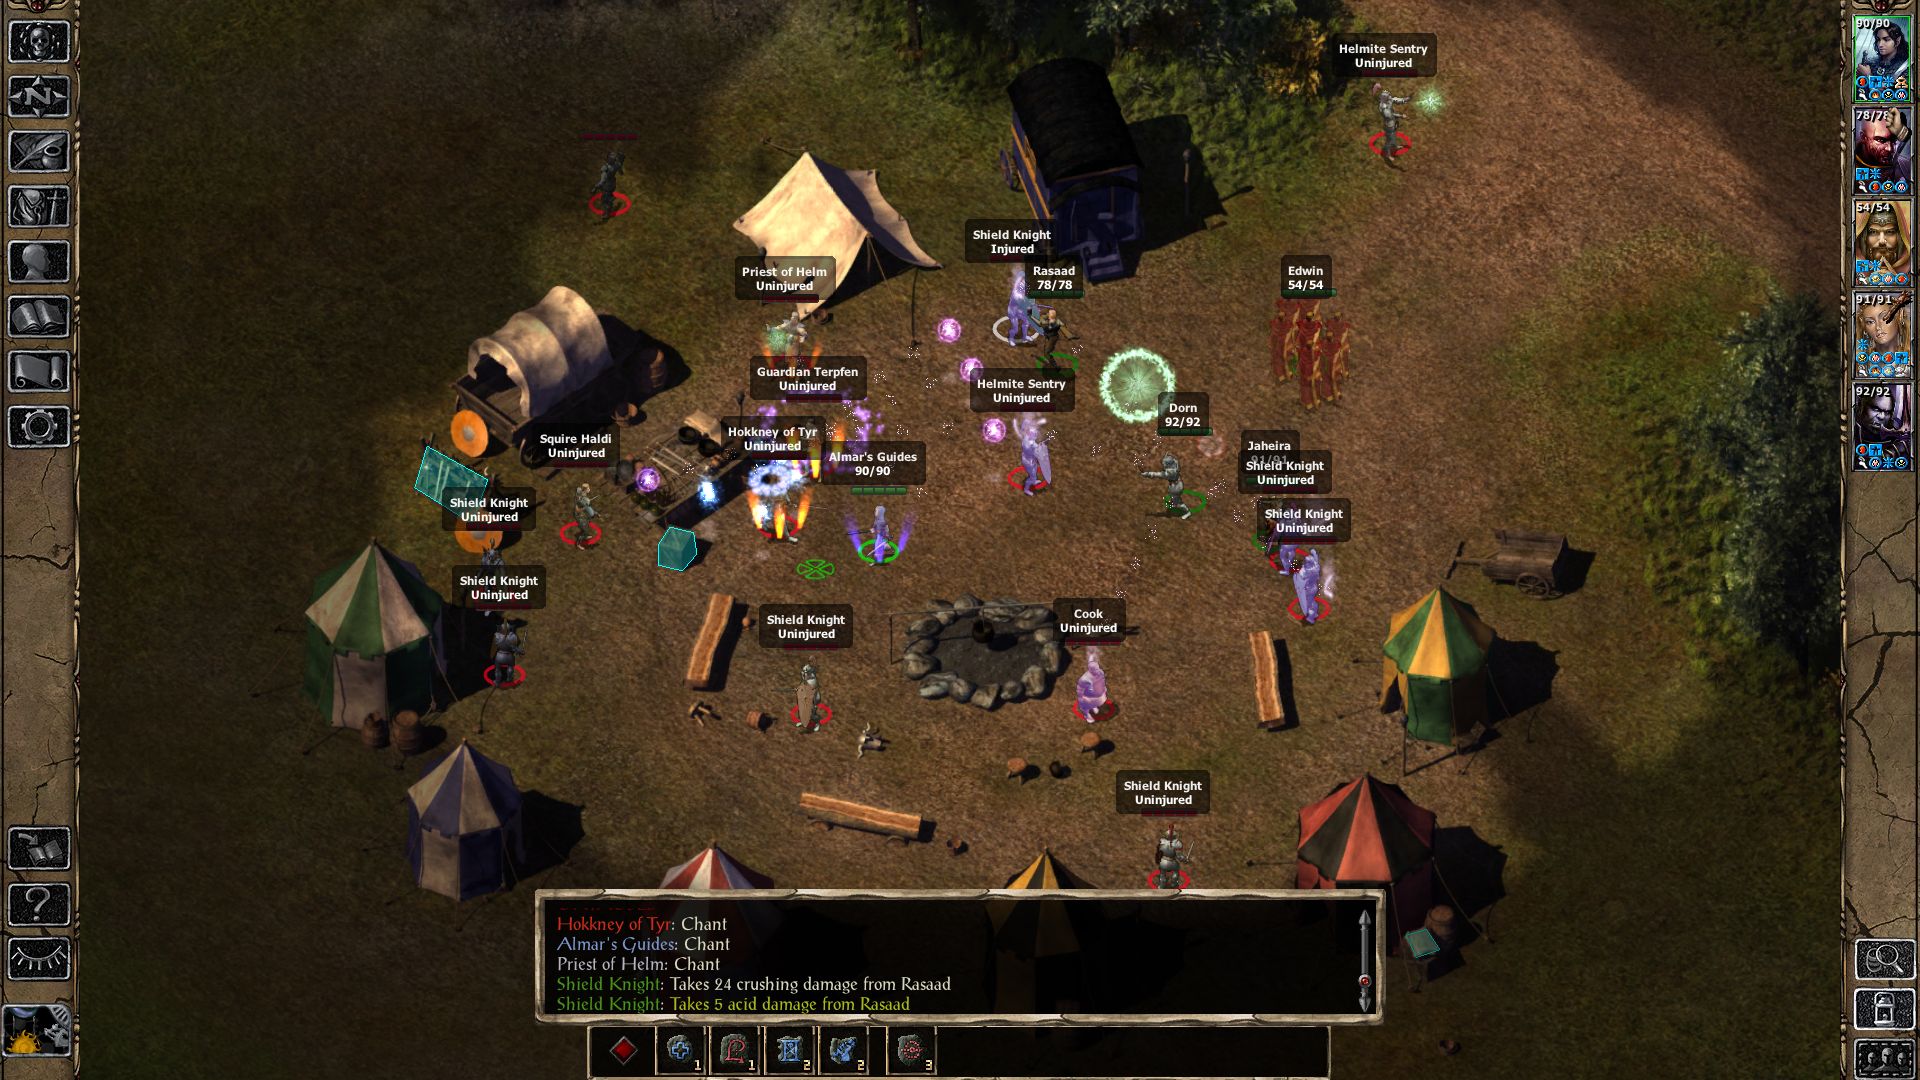
After you've taken out Guardian Telwyn and all of the Helmites the next time you Fast Travel anywhere you'll be waylaid by an ambush. Much like with the Helmite Camp each of these Paladins will drop a few magical items so be sure to loot all you can. You'll be approached by Azothet's apparition after the fight for some dialogue after which you'll get some dialogue with Ur-Gothoz too.
Now we're going to be faced with a decision of who do we want Dorn to swear allegiance to? We still have a little bit of time to contemplate this, a location called Resurrection Gorge will be added to your map after your dialogue with Azothet and Ur-Gothoz. As you can probably already guess our next destination will be Resurrection Gorge.
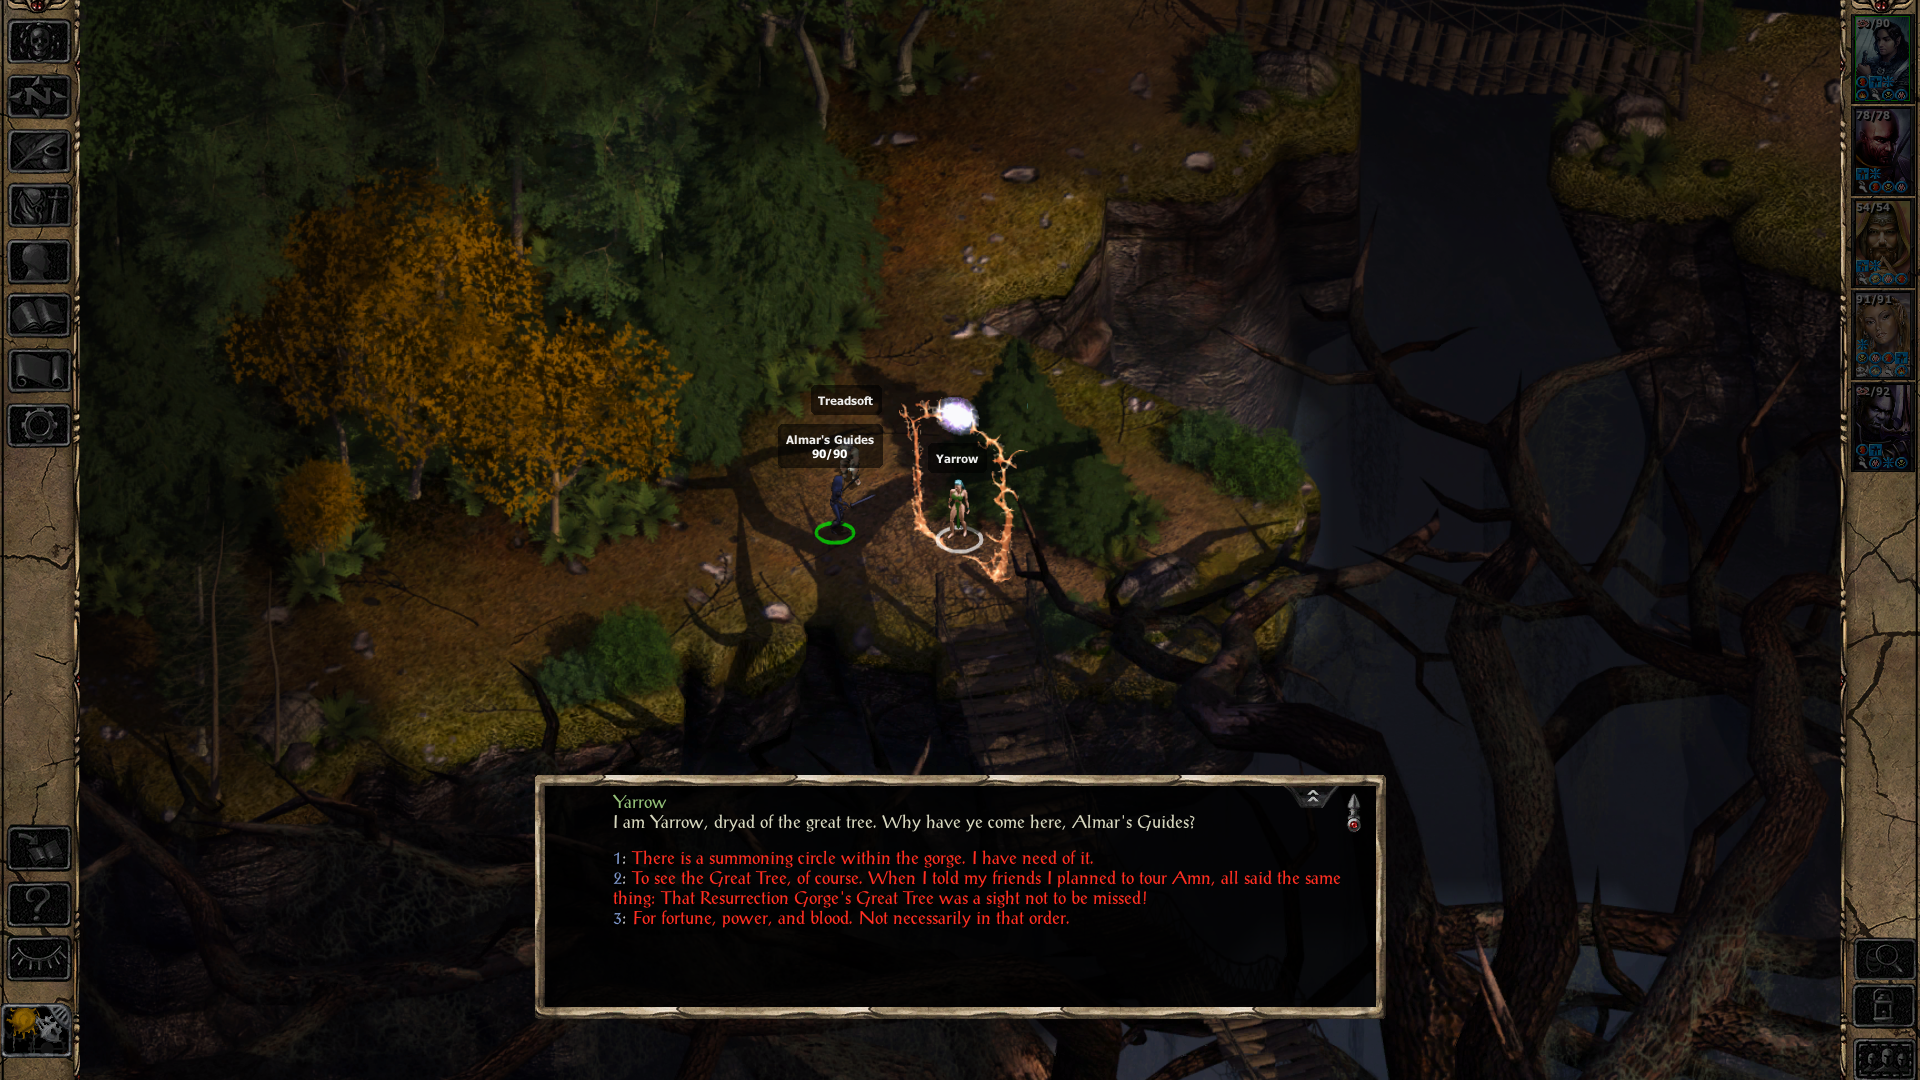
In the upper portion of Resurrection Gorge you'll find a single vendor named Summerheigh near the entrance of this map. Further north of Summerheigh you'll find Treadsoft & Yarrow who are the current "protectors" of this area. You have 2 options for dealing with these 2, you can kill them or you can leave them alive. If you kill them (best option) loot the Acorns of Yarrow which will allow you to teleport in and out of the gorge below.
Leaving them alive means you'll not be able to leave the gorge until you're finished. There is no Reputation hit for killing Yarrow so I recommend you go that route instead because you'll want to be in control of when you can teleport in and out of the Gorge.
Once you're in the bottom portion of the gorge you're tasked with obtaining 3 Summoning Stones and performing a ritual inside the central tree. Below are the locations of all 3 Summoning Stones that you will need to perform this ritual.
Winterbrook's Summoning Stone: You can persuade Winterbrook to get this stone for you by being nice or simply enter the cave in the waterfall behind her and retrieve it yourself. There will be a few myconid in this cave but nothing you can't handle at your level.
Fil's Summoning Stone: Help Fin by obtaining the Purple Crystal nearby and giving it to him. Alternatively, you can pick pocket him or attack him for it.
Xachrimos' Summoning Stone: Occasionally you'll see text bubbles pop up around the gorge and when you check your text log they'll be from a creature named Xachrimos. Use the Potion of Clairvoyance you find in the gorge or any spell that dispels invisibility where you see the text bubble and you'll reveal Xachrimos. The Glitterdust Wand works well that you get from the Purple Crystal area in the northeast. Attack Xachrimos once he's exposed and take the Summoning Stone from him along with his sword.
Note: If you rest outside in the gorge Xachrimos will appear and attack your group. Defeating him will allow you to teleport outside of the gorge by talking with Yarrow again (if you spared Yarrow's life). Defeating Xachrimos will also get you the Abyssal Blade you need to complete the ritual.
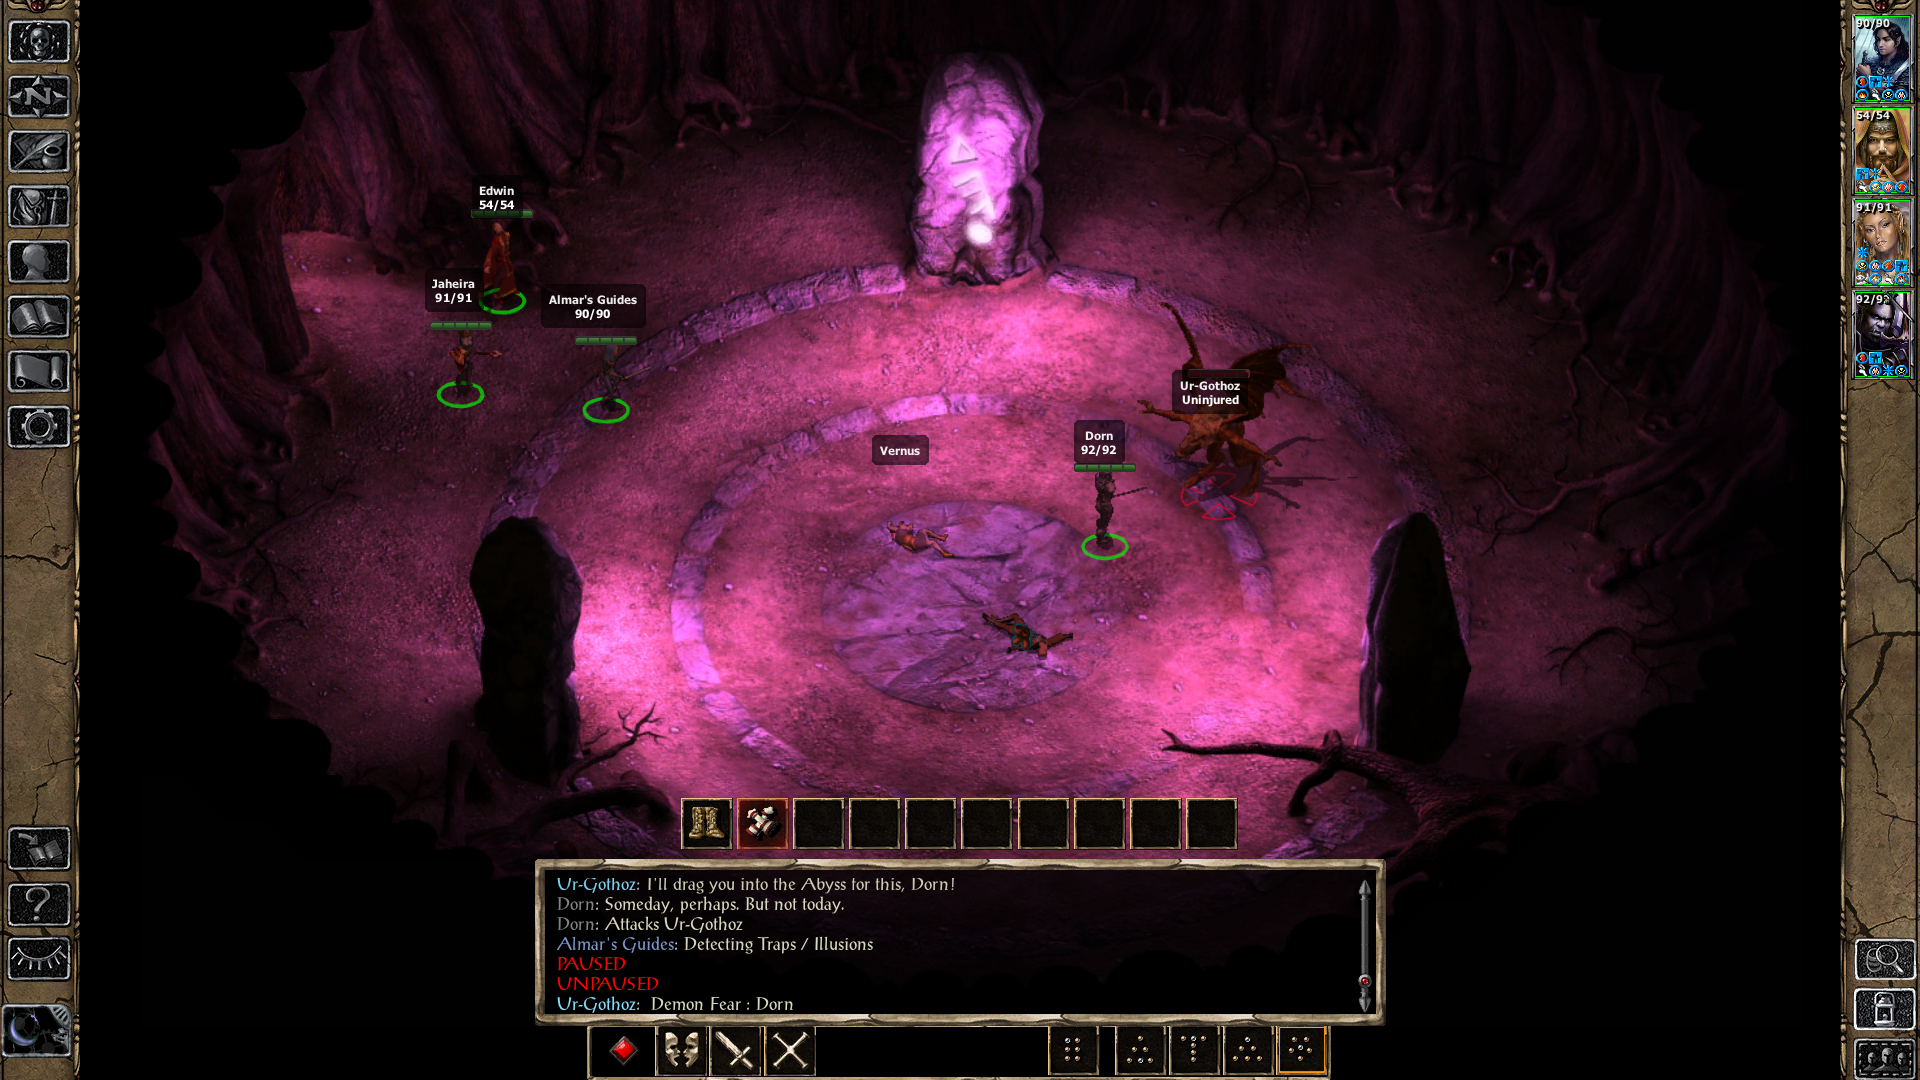
With all 3 stones in hand enter the tree and talk with Dorn. You'll have to choose which demon you want to bind to the sword, Azothet or Ur-Gothoz. Also, you'll have to choose who you want to sacrifice to perform the ritual. Choices include using a Companion, a Summoned creature or using resurrection on Vernus whose already in the circle and using him.
The demon you choose to bind to the sword will change your reward slightly, Azothet will give you +5 Slashing Damage vs Demons and Ur-Gothoz will give you +5 Slashing Damage vs Devils. Remaining with Ur-Gothoz this entire time will also net you a bonus reward, The Visage. A quick list of the differences is shown below:
Azothet Bound: +5 Slashing Damage vs Good Aligned Opponents and +5 Slashing Damage vs Demons
Ur-Gothoz Bound: +5 Slashing Damage vs Good Aligned Opponents and +5 Slashing Damage vs Devils + The Visage
Once the ritual is finished you'll have to speak with either Azothet or Ur-Gothoz, depending on who you chose to bind to the weapon. At this point you'll be given the option of betraying your current master and binding them to the same sword. This is the worst choice you could make considering it'll cause Dorn to lose all of his Blackguard abilities and all it will do is minorly buff the sword.
If you choose to bind the 2nd demon to the sword it'll add either +5 Slashing Damage vs Demons or +5 Slashing Damage vs Devils depending on who you choose to bind to it. With the ritual finished we're done here - either use the Acorns of Yarrow to teleport out or summon Yarrow by walking around the area near Winterbrook and then talk to Yarrow to be teleported out.
Those of you who chose to spare Xachrimos will have a slightly alternate way of leaving the gorge. When Yarrow teleports in Xachrimos will kill her and she'll drop the Acorns of Yarrow you need to teleport out. Sometimes this part is buggy though because Beamdog made this quest and it may not always play out as intended. Either way, we're done here and with this quest.