
Spellhold Tests 'Good' Route Overview - Baldur's Gate 2
When you meet the Apparition in the main map of Spellhold Tests for the first time you'll be given 2 different ways of responding. If you agree to his tests willingly you'll be placed on the map shown above which is known as the first "good" path of the Spellhold Tests. Refusing to participate in the Spellhold Tests or answering aggressively will put you on the "bad" path.
If you continue along the "good" path the entire time then the ultimate reward you get for completing the Spellhold Tests will be 10k more EXP for each member of your party. The 2nd and 3rd "good" paths will also have magical items that you'll only get if you're on that path.
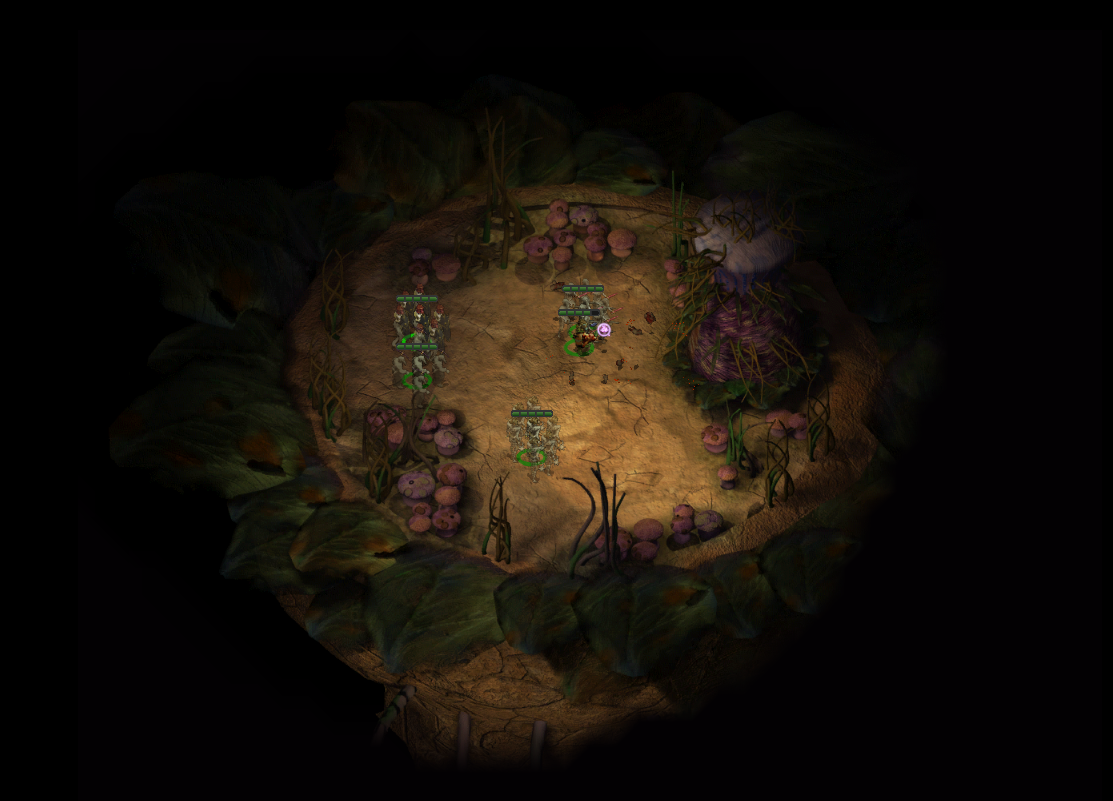
Anyway, once you clear the single Myconid enemy from the map shown above the Apparition will appear and he'll ask you a question. The question remains the same whether or not you're on the good or bad paths as does the answer.
Riddle Answer: A Splinter
Spellhold Tests #2 Good Path
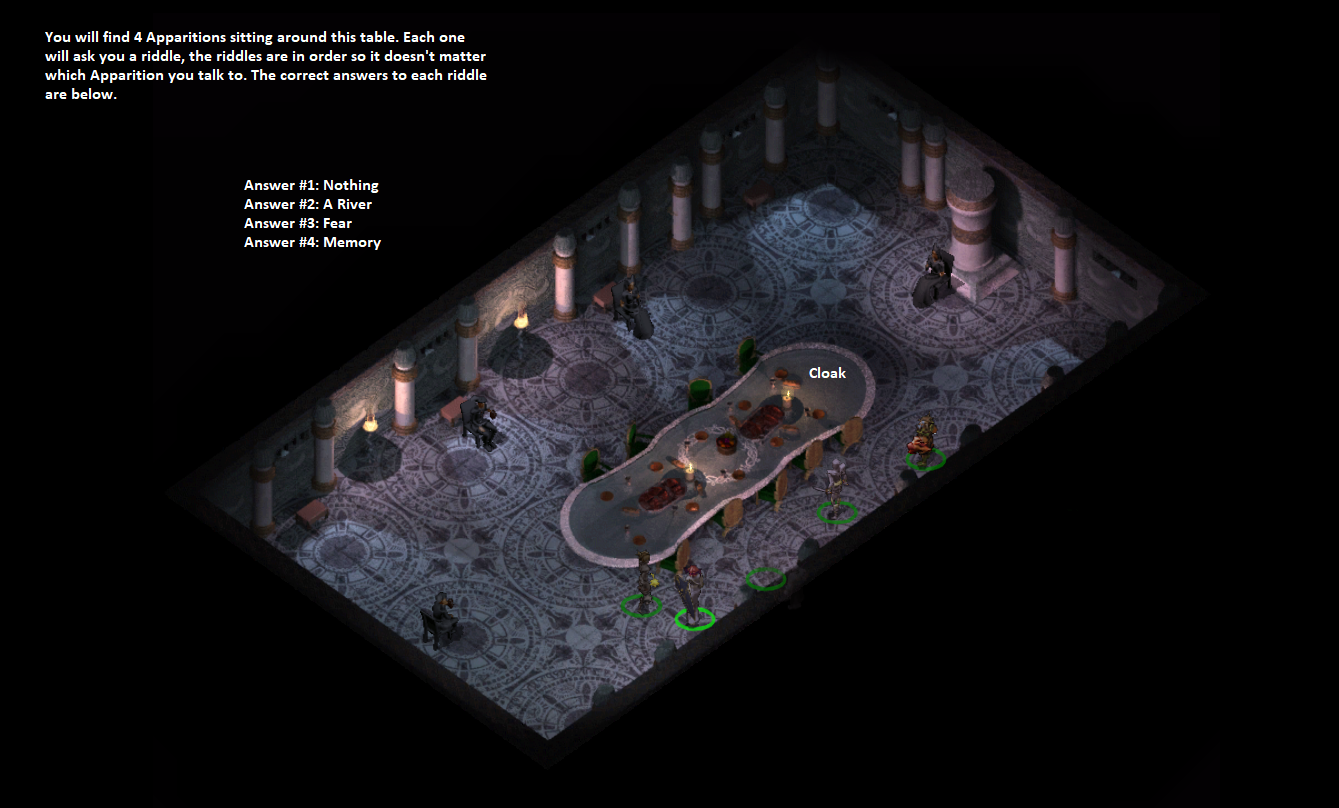
The second "good" path that you will be visiting is the map shown above. It's a large dinner table with 4 different Apparitions sitting in chairs around it. Before you do anything on this map you should loot the Cloak of Reflection from the table in the middle. Once you speak to any of the Apparitions you'll lose your chance to loot this cloak permanently.
How this map works is pretty straight forward, if you speak to any of the Apparitions you'll begin the event. Once the event begins you will be asked a total of 4 different riddles, if you get the first 2 correct you pass and move to Judgment. Getting the 3rd riddle wrong will teleport you to a room with some enemies then you'll be sent to Judgment (the final room of the Spellhold Tests).
If you get the 4th riddle wrong you'll be teleported to Spellhold Tests #3 Good Path (1) which you can find below. This is a machine puzzle which, if successfully solved, will reward you with Bracers of Defense AC 5. Even though you answer 1 of the riddles wrong you'll still get the full 50k EXP at Judgment when we're done. Last but not least if you get all 4 riddles correct you'll be sent to Spellhold Tests #3 Good Path (2) which you can also find below. This map involves some trolls and will reward you with Heart of the Mountain and Bone Club +2.
Confused? Below you'll find all of the correct answers for each riddle as well as the same information I gave you above just in an easier to understand format.
Correct Riddle Answers:
Answer #1: Nothing
Answer #2: A River
Answer #3: Fear
Answer #4: Memory
Answer 4th Riddle Wrong: You will be teleported to Spellhold Tests #3 Good Path (1) and be able to get Bracers of Defense AC 5; you'll still get the full EXP amount at the end of the Spellhold Tests during Judgment.
Answer ALL Riddles Correctly: You will be teleported to Spellhold Tests #3 Good Path (2) and be able to get Heart of the Mountain and Bone Club +2.
Spellhold Tests #3 Good Path (1)
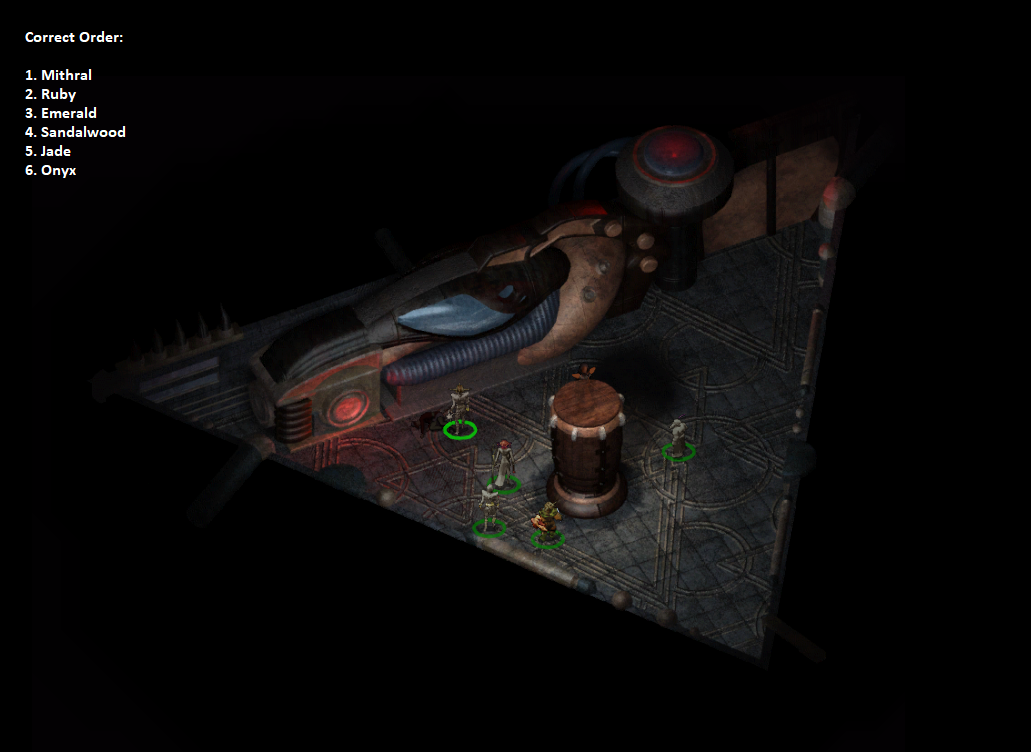
You will only enter this map if you answered the 4th riddle incorrectly during the Spellhold Tests #2 Good Path, there is no other way here. On this map you will find a large machine that has numerous levers for you to pull - using any lever in the wrong order will result in a Lightning Bolt being shot out of the machine at you.
Below you will find the correct order that you must pull these levers in. Your reward for successfully completing this puzzle will be Bracers of Defense AC 5 and you'll move onto Judgment (Good). Even if you refuse to solve this puzzle and tell the Apparition you want to move onto Judgment you'll still get the good outcome.
Correct Lever Order:
1. Mithral
2. Ruby
3. Emerald
4. Sandalwood
5. Jade
6. Onyx
Spellhold Tests #3 Good Path (2)
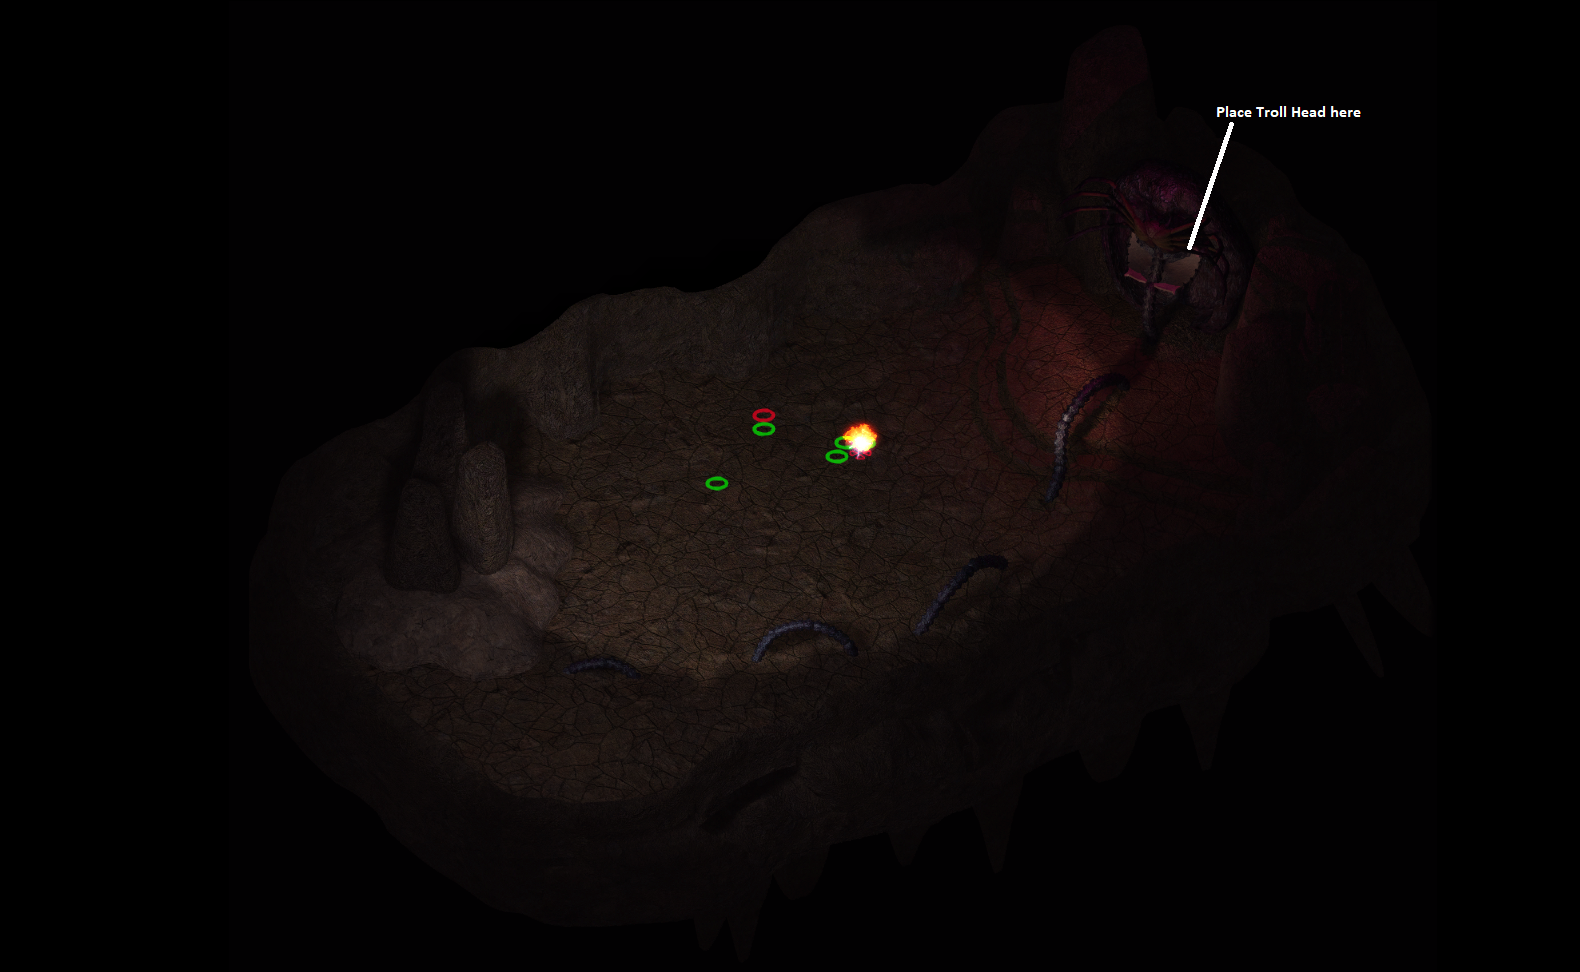
This map is the one you will visit if you answer all 4 riddles correctly during the Spellhold Tests #2 Good Path. You will have to fight 3 different troll enemies on this map which will drop Heart of the Mountain and a Giant Troll's Head which you can place into the altar near the Apparition to receive Bone Club +2.
Once you've collected both items and you're ready to proceed speak with the Apparition and tell him you're ready for Judgment. This will teleport your group to the final Spellhold map which will conclude the Spellhold Tests. For more information about this whole process as well as Judgment I recommend you return to my Spellhold Tests Overview page.