
Spellhold Dungeon Level 1 Overview - Baldur's Gate 2
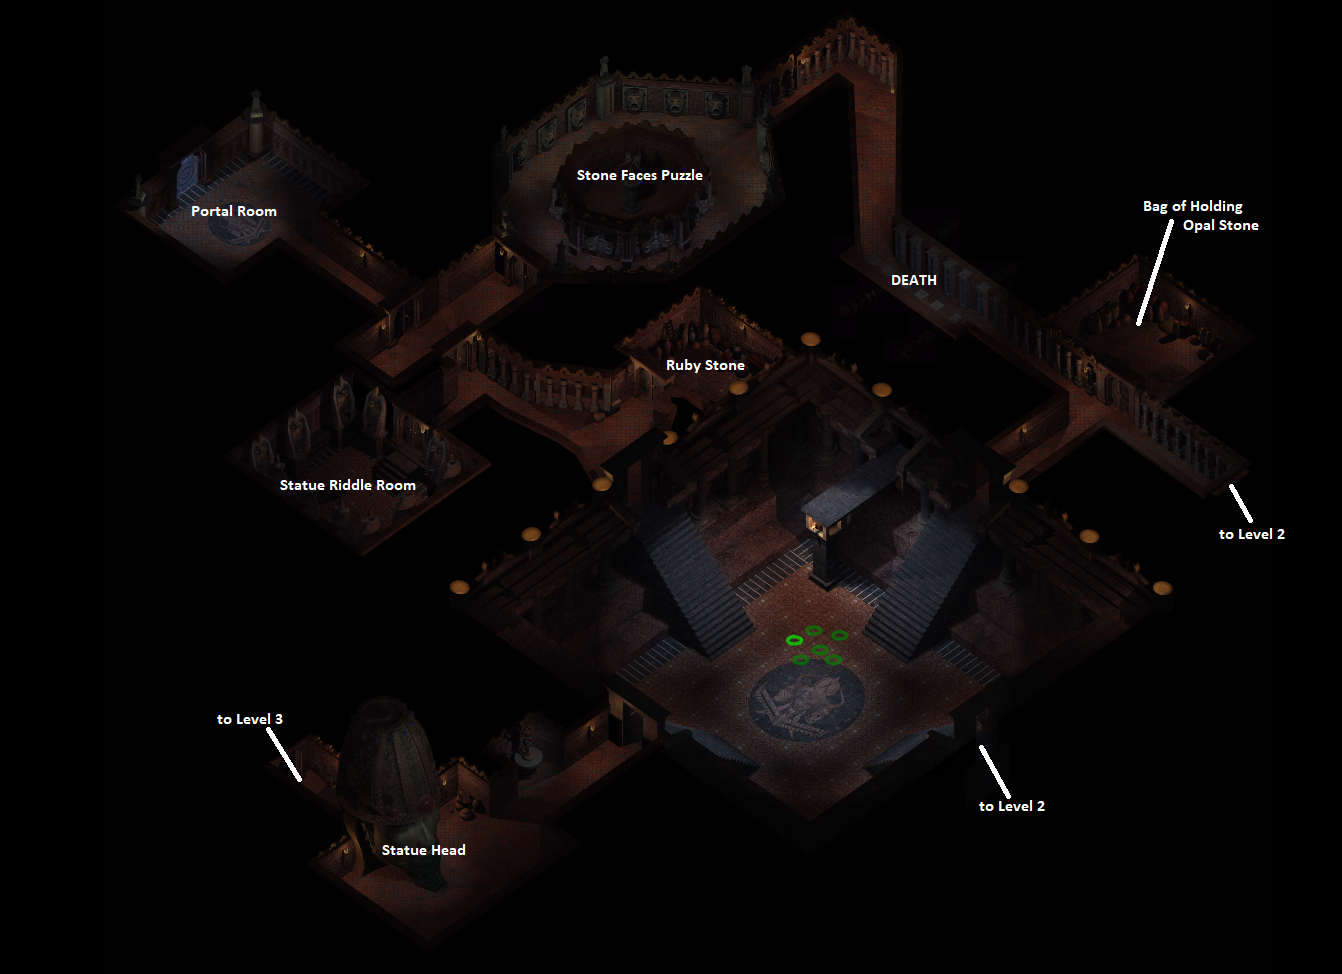
After being captured by Irenicus inside of Spellhold you'll regain control of your party in the Spellhold Dungeon (Level 1), the same location I am standing at in the picture above. Imoen will be nearby if you'd like to recruit her back into your party at this time as well. The most important thing I can draw your attention to in Spellhold Dungeon Level 1 is the Bag of Holding that you can find in the northeastern room. This item will make dungeon crawling significantly more enjoyable for the rest of the game.
How this dungeon works is Levels 1 and 2 are connected and you can easily pass between them via doorways in the south. In order to reach Level 3 you'll need to collect The Hand of Dace and Kurtulmak's Crystal Shard, having both of these items in your inventory will allow you to open the Statue Head in the southern portion of this zone. Both of these items are found on Level 2, almost everything on Level 1 is optional.
Continue to Spellhold Dungeon Level 2 Walkthrough
Bag of Holding & Opal Stone: Here you will find one of the most important items in the entire game, Bag of Holding. You'll also find an Opal Stone at this location which is an item we'll be using at the portal in the northwestern portion of this area.
DEATH: As the name suggests, running through this hallway will result in your immediate death. The walls will smush you between them and instantly kill any character that comes this way.
Ruby Stone: You'll find a Ruby Stone in this room which can be used at the Portal in the northwestern portion of this area to summon a pit fiend worth 9000 EXP.
Statue Riddle Room: For this puzzle what you have to do is pick up all of the items from the chest in the center of the room and place them into the correct statue's inventory. I have included a picture below to show you the appropriate order, otherwise check out my BG2 Spellhold Dungeon Statue Puzzle Solution Youtube Video if you prefer that format instead. Completing this puzzle will get you a Dusty Rose Ioun Stone as well as a Sapphire Stone which is used for activating the Portal.
Stone Faces Puzzle: Here is another puzzle, this one will require you to answer 12 different questions in order to pass the test. Answering all 12 riddles correctly will get you a Ring of Regeneration along with 5000 EXP for everyone in your party. Much like with the previous puzzle I have provided a picture below that will give you all of the answers. Alternatively, if you'd like to see a video depicting this puzzle check out my BG2 Spellhold Dungeon Statue Faces Riddle Answers Youtube Video.
Portal Room: The Ruby Stone, Opal Stone and Sapphire Stone are all required to activate the portal in this room. Each of these stones will summon something different when interacting with the portal. Opal Stone will summon a Greater Wolfwere, Ruby Stone will summon a pit fiend and the Sapphire Stone will summon a genie who gives you Doomplate +3.
Statue Head: At this location you'll find a Statue Head which starts off closed. In order to open it you'll need to collect The Hand of Dace as well as Kurtulmak's Crystal Shard, if you have both of these items in your inventory then it will open for you and allow you to pass.
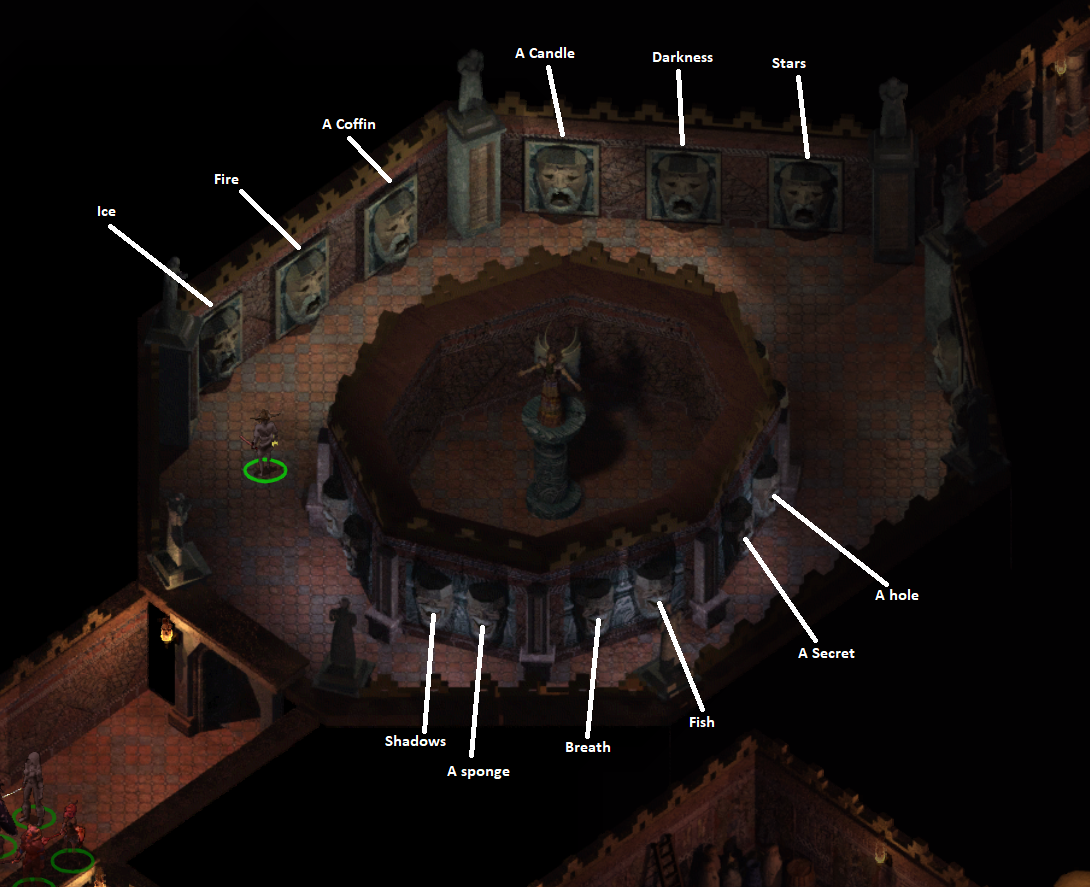
Statue Faces Riddle in Spellhold Answers
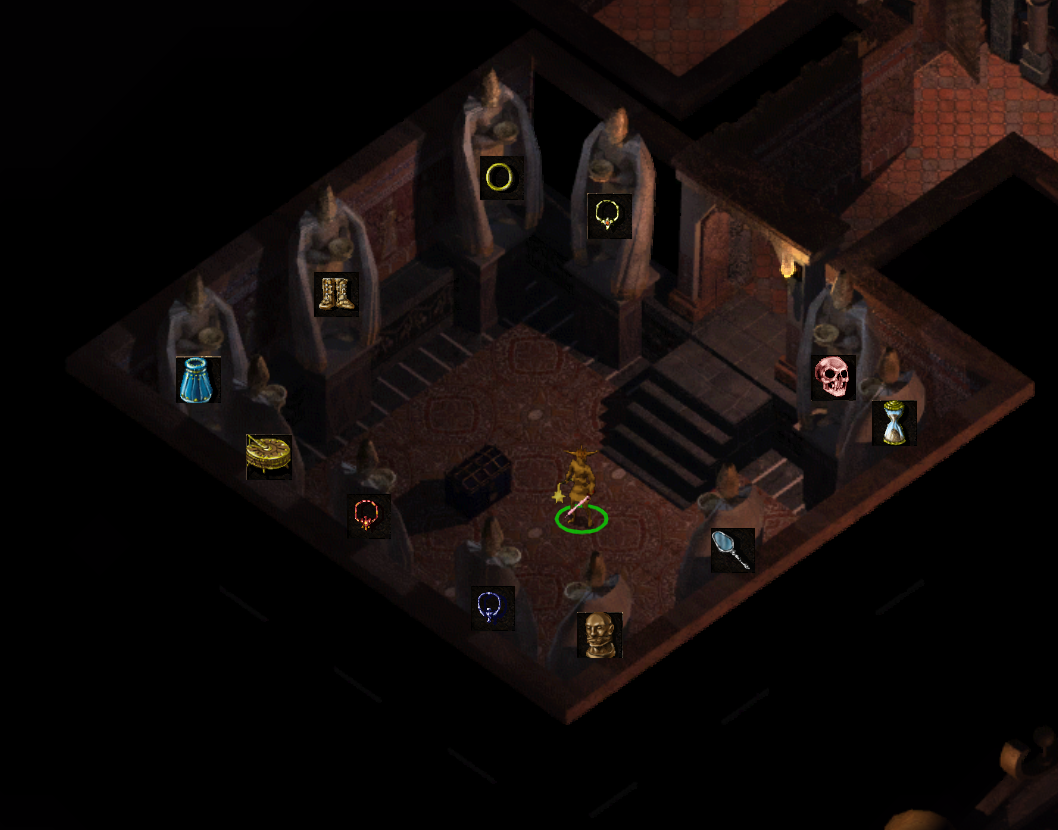
Statue Riddle Room in Spellhold - What items go where