
Baldur's Gate 1 - Chapter 2 Walkthrough
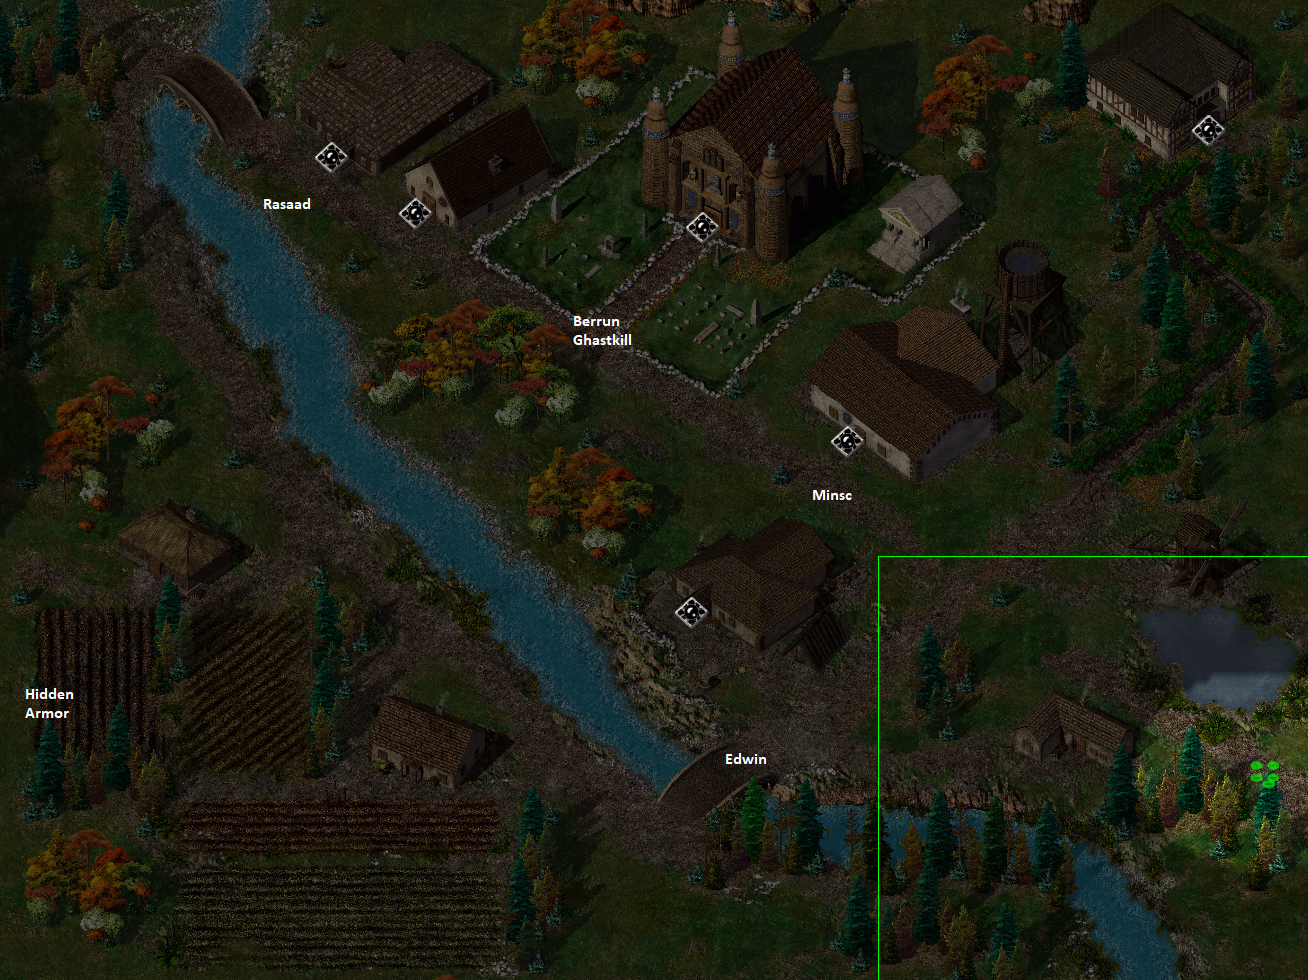
To advance the story forward in Nashkel all you need to do is speak with Berrun Ghastkill who is found outside the large church in the center of town. Before leaving the town I recommend you check out the vendors, make any adjustments to your party with new companions and also collect the hidden armor. There are a couple side quests available in this town but I do not believe any are worth doing. Hold down the TAB button and talk to every NPC that has a unique name and you will easily find the side quests.
I'd recommend you give Minsc and Rasaad a try as companions even if it means kicking someone out of your party. Minsc has some of the best dialogue in the game and Rasaad is one of the new companions added with the Enhanced Edition. All of the locations mentioned below are marked on my map above.
Berrun Ghastkill: The Mayor of Nashkel whom you'll need to speak to when you first arrive and after you clear the mines.
Rasaad: Rasaad is one of the new companions added with the Enhanced Edition. If you have this version of the game he will be here for you to recruit.
Minsc: Minsc is one of the available companions in this town and one of the more memorable companions in BG1. He has a bunch of comical dialogue about his pet hamster who is no ordinary hamster, it's a giant space hamster.
Edwin: Edwin is another one of the available companions in this town and is a good choice if you're doing a Neutral or Evil playthrough since his alignment is Lawful Evil.
Hidden Armor: In a hole near a tree you'll find a hidden area which will contain this armor. Hold down TAB on your keyboard to highlight all areas that you can interact with nearby.
Prior to leaving town you'll want to head inside of the Temple of Helm that Berrun Ghastkill is standing outside of and speak with Nalin to begin a semi important side quest. I recommend you complete this side quest now along with a few other ones before proceeding to the Nashkel Mines. This side quest as well as the one Minsc and Edwin give you are also timed which is part of the reason we should do them now - but we also need the EXP. When I say timed, I mean you have like 20 - 40 days to complete them or something very long like that.
Aside from the Gnoll Stronghold there are many other side areas for us to explore for loot and EXP; it's up to you how much of this you'd like to complete and how thorough you'd like to be in each area. Finish the timed quests then I recommend you at least explore all of the named areas on your map - Carnival, Ulcaster, Gullykin, High Hedge, Seawatcher, Larswood and Peldvale.
Those of you who wish to skip ahead and go straight to the Nashkel Mines, scroll down the page a bit further.
Side Quests & Activities:
(Minsc) Rescuing Dynaheir: If you recruit Minsc into your party you'll be given this side quest which requires you to travel to the Gnoll Stronghold and save Dynaheir. Even if you don't plan to have Minsc in your party I still recommend you travel to the Gnoll Stronghold as it's good EXP and a worthwhile dungeon to complete.
(Edwin) Edwin and Dynaheir: Alternatively, if you recruit Edwin into your party you'll still have to go to the Gnoll Stronghold but instead of saving Dynaheir it will be to kill her.
(AR4100) The Tale of Captain Brage: Nalin inside the Temple of Helm asks you to locate Captain Brage and return him safely to Nashkel. You can find Captain Brage in the wilderness zone (AR4100) which is located to the north of the Gnoll Stronghold. When Brage asks you a question the correct answer is "Death". Answering correctly will teleport you and your party back to Nashkel inside of the Temple of Helm.
(AR3700) Bassilus the Murderer: Bassilus is found in AR3700 which is a wilderness zone just south of High Hedge on the world map. When you approach the area dialogue will begin with Bassilus as he talks to his undead family, if you choose dialogue options 3, 1, 1 then the undead will die before the fight with Bassilus begins. He drops some good loot either Ashideena +2 or War Hammer +2 and a pair of cursed gauntlets. Bassilus's Holy Symbol is the item you will need to pick up and turn in at the temple to the east of Beregost. Kelddath Ormlyr is the person at the temple whom you'll need to turn it into.
(AR3700) Melicamp the Chicken: To the north of where you kill Bassilus you'll find Melicamp the Chicken. Essentially all you have to do for this quest is to talk to Melicamp in the AR3700 zone and bring him to High Hedge. Once here give Melicamp to Thalantyr, the mage of High Hedge and make sure you agree to help fix Melicamp. Thalantyr will ask you to retrieve a Skull from one of the Undead outside the building and bring it back to him. I highly recommend you save your game because there is a 50/50 shot Melicamp is killed during the spell cast. Give the Skull to Thalantyr and then cross your fingers and hope Melicamp is saved.
(AR4100) Charleston Nib Excavator: Charleston Nib is found on the same wilderness map that Captain Brage is found on. When you first talk to him you can get 100g by acting as security for one day on the dig. Gallor will approach you after you speak to Charleston Nib and ask you to take out Charleston for some gold. It's up to you which path you follow, the next scene happens inside the crypt after talking with Charleston. The workers go mad and attack and you'll have to kill all of them, after it's all said and done you can loot the Idol of Kozah from the crypt and leave. When you step outside with the Idol of Kozah in your inventory you'll be attacked by the Doomsayer enemy, it's a tough fight but good EXP.
Carnival: Each of the tents in this zone have a unique event or dialogue. Most notable in this area is the stone statue of Branwen, a potential companion in the game. You can use a Stone to Flesh scroll on the statue to dispel it and Branwen will ask to join you. The best tents to go inside are the Potion Merchant's Tent where you'll be able to buy a Red Potion and Violet Potion for 50gp each. Zordal's Tent will involve an easy fight with Zordal along with numerous items from him and Bentha (if she dies you get all the loot, if she lives you get 1 item). Most of the other tents have various items for sale or containers to rummage through.
Ulcaster School: This area is both a wilderness map as well as a dungeon. Ulcaster Dungeon is easy enough for a low level group to clear and has a handful of mediocre loot. For the most part the best items you'll find in here are magical arrows. If you talk to Ulcaster outside the dungeon enough times he'll give you a side quest to retrieve Ulcaster's Dusty History Book from inside the dungeon. This quest gives 1000 EXP and is worth doing.
Gullykin: In the north part of the Gullykin Map there will be a Halfling Village which connects to the Firewine Ruins dungeon. You can find a Sling +1 inside a locked cupboard in the southeastern most Halfling House. Firewine Ruins entrance is found in the western most building in the Halfling Village (marked Temple and Winery on map). The southern half of the zone will have a group of mercenaries hired by the Iron Throne to kill you which are carrying some nice items. Long Sword +1, Chain Mail +2, Morning Star +1 are among them.
High Hedge: Kivan is a potential companion that you can recruit in this area, he's found north of the High Hedge building. The main attraction in High Hedge though is the Wizard's shop in the central portion of the map. Here you can buy various different magical items including lots of ammunition. The best items he sells are his Wizard spells, Potion Case, Robe of the Good Archmagi and Robe of the Neutral Archmagi.
Seawatcher: Manual of Bodily Health (+1 Constitution) is found here along with many Sirine enemies that give 2000 EXP each. There is also a few minor events and side quests to complete here.
Larswood: In the northeastern portion of this area you will find a Druid Shrine with an event. You can also find a Bandit named Teven who will have an event in the southwest portion of the map. This event is used in a story quest involving the Bandit Camp during Chapter 3. If you're playing the Enhanced Edition and your group is at least level 5 you can meet Baeloth here as well.
Peldvale: Only 2 notable things happen here. The first is you'll meet Viconia, a potential companion on this map. Second is this map and Larswood are your only 2 methods of traveling to the Bandit Camp during Chapter 3 and it being friendly to you.
When you are ready to continue with the story you'll want to head to the Nashkel Mines. If you talked to Dorn at the Friendly Arm Inn during the previous chapter then on your way to the Nashkel Mines you'll be waylaid by a group of bandits and Dorn will show up and help you during the fight. It's at this point that Dorn will offer to join your party, if you decline him here he will wait for you at the Friendly Arm Inn.
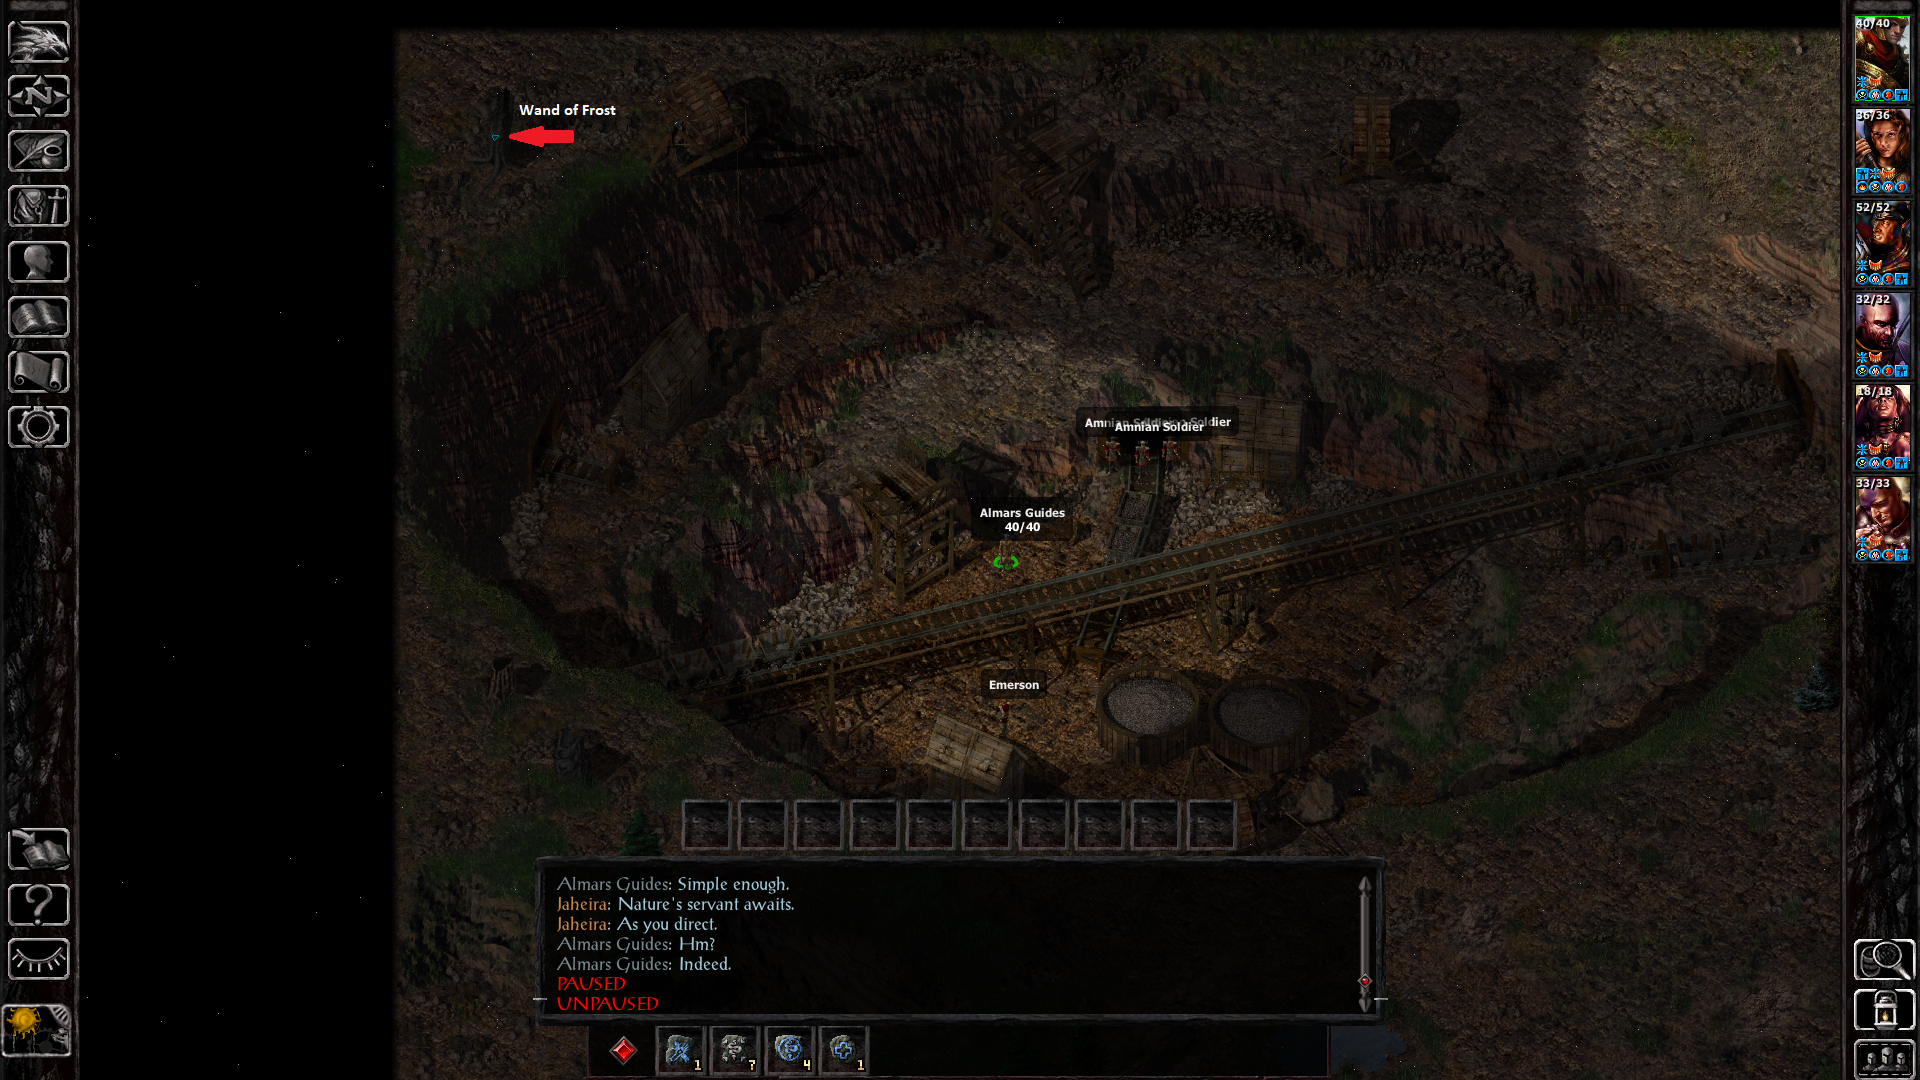
At the Nashkel Mines there are a couple things for us to do outside before heading into the mines. North of the mine entrance you will find a Wand of Frost hidden in a tree; to the south you will find an NPC by the name of Prism who is working on a sculpture. Offer to protect Prism as he finishes his artwork and Greywolf will show up to fight you, killing Greywolf will net you Varscona +2 which is a great weapon for this point in the game.
There are other enemies and events you can do in the area but none have good rewards - when you're ready speak with Emerson outside of the Nashkel Mine to update your quest then go inside.
Kylee's Dagger: In the southern portion of the first floor Miner Dink will approach you and ask you to deliver Kylee's Dagger to him on Level 2. You can find Kylee in the western portion of Level 2, turning the dagger into him gets you 200 EXP.
There are a total of 4 floors in Nashkel Mine and on the bottom floor is where you'll find Mulahey's Lair. Mulahey is the boss of the Nashkel Mines and the first real boss of Baldur's Gate 1. I recommend you save before fighting him if you're playing on a difficulty where your party can die as this fight can be hard depending on your group positions.
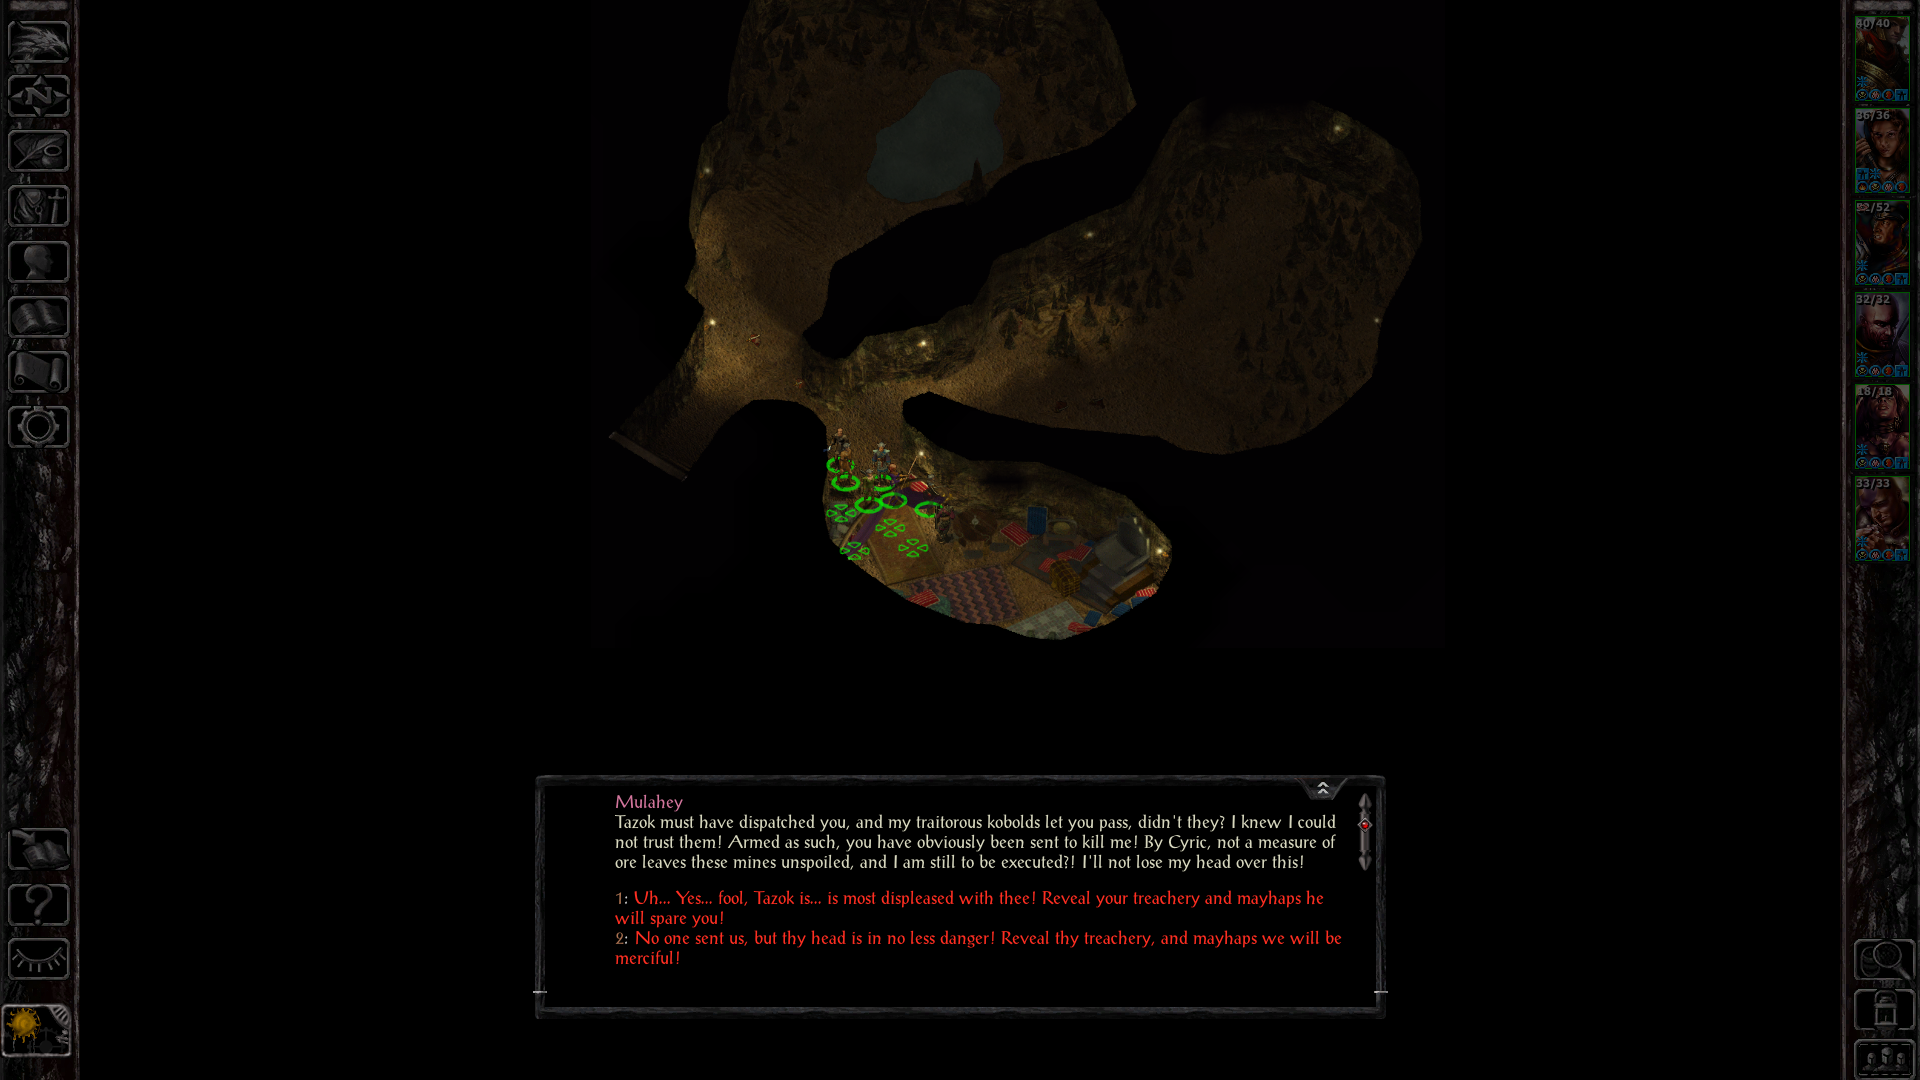
Mulahey will summon a bunch of Skeletons and Kobolds when the fight starts, they will flood into the room from the same entrance we came through as well as from the northern most room. A well placed tank will block the enemies from reaching your more squishy characters like your Mage. When you get Mulahey's health low enough he will surrender to you, decline his surrender because if you accept it he'll just summon more adds and attack again.
After Mulahey has been defeated be sure to loot Mulahey's Holy Symbol and the 2 Letters that he dropped. You'll also want to search Mulahey's Chest which contains Moonblade +3 (Xan's Sword) along with a couple of other useful items. Mulahey's Holy Symbol is a quest item and required to prove to Berrun Ghastkill in Nashkel that you've taken care of the problem at the mines.
In Mulahey's Lair you'll also notice someone else by the name of Xan, he is one of the available companions in this game if you'd like to recruit him. Once Mulahey is dead you will immediately get a cinematic which marks the end of Chapter 2 and the start of Chapter 3.
Return to Chapter 1 Walkthrough
Continue to Chapter 3 Walkthrough