
Upper Blackrock Spire Instance Guide (Classic - WoTLK)
Upper Blackrock Spire was the only 10man in Classic WoW. UBRS was the hardest non-raid zone in Classic WoW, best known for the Rookery which spawned the classic video, Leeroy Jenkins. UBRS is also combined with a 5man instance, LBRS. It used to require a key in order to enter Upper Blackrock Spire, the Seal of Ascension is no longer required to enter nor does it require 3 people to summon Pyroguard Emberseer.
General Drakkisath, the final boss of UBRS may still give some players trouble even at level 80 with his Conflagration ability. For a list of quests involving both LBRS and UBRS click here.
The first boss you will encounter in UBRS is Pyroguard Emberseer. In order to trigger the event to kill him you will first need to click on the pedestal and channel it until the mobs in the room become hostile. After you kill them you will need to wait until he reaches full strength, then attack.
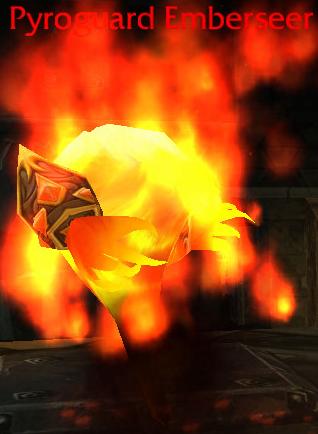
Pyroguard Emberseer is an easy straight forward fight. He only has two abilities, Flame Buffet and Fire Nova. His Fire Nova hits like a truck and will hit even harder with more Flame Buffet Stacks. All of Pyroguard Emberseer's damage is fire so if you have a Paladin or Shaman make sure they throw down some sort of Fire Resistance.
Loot Table:
Flaming Band
Truestrike Shoulders
Emberfury Talisman
Wildfire Cape
Gauntlets of Elements
Tablet of Flame Shock VI
After you kill Pyroguard Emberseer the next boss you'll come to will be Solakar Flamewreath. In order to start the event to summon Solakar Flamewreath you will need to loot the Father Flame on the western side of the room.
After you loot the Father Flame it will start an event and waves of Dragonkin will come out at you. After you fight off all the waves Solakar Flamewreath will yell out then come running.
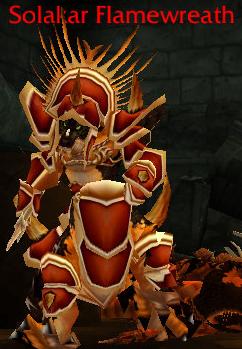
Solakar Flamewreath is a simple tank and spank. The only ability he has is War Stomp, which will deal damage to nearby enemies and stun them for 5 seconds.
Loot Table:
Dustfeather Sash
Polychromatic Visionwrap
Devout Mantle
Crystallized Girdle
Nightbrace Tunic
Schematic: Hyper-Radiant Flame Reflector
After Solakar Flamewreath you will come across Goraluk Anvilcrack.
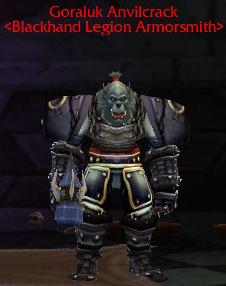
Goraluk Anvilcrack is another basic tank and spank fight. The only special move he does is Backhand which will stun an enemy for 2 seconds.
Loot Table:
Handcrafted Mastersmith Girdle
Flame Walkers
Bottom Half of Advanced Armorsmithing: Volume I
Mastersmith's Hammer
Handcrafted Mastersmith Leggings
Plans: Arcanite Champion
Plans: Masterwork Stormhammer
After Goraluk Anvilcrack the next boss you'll fight is Warchief Rend Blackhand. In order to fight Rend Blackhand you will need to jump down into the large room to the east of Goraluk Anvilcrack. When you head to the middle of the room it will trigger an event and waves of Dragonkin will come out and attack you. After roughly 7 or 8 waves Rend will come out riding his dragon, Gyth.

Gyth may be a challenge depending on how many people you have and if they're ready for the fight. Gyth has 3 different types of breaths, Fire, Acid and Frost. On top of his breaths he will also knock players back. The tank should be the only person in front of Gyth making sure he is the only one that gets hit by his breath. When Gyth dies Rend will dismount from him.
Loot Table:
Dragoneye Coif
Tribal War Feathers
Dragonskin Cowl
Pauldrons of Elements
Gyth's Skull
Chromatic Carapace
Recipe: Flask of Chromatic Resistance
Immediately after Gyth you will have to fight Rend.
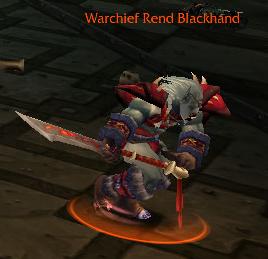
Rend is a Warrior Based Opponent. He will use Mortal Strike, Whirlwind and Cleave. Since he does Whirlwind it's important to keep him away from any healers or clothies otherwise they could be in a world of hurt. Simple fight, similar to Gyth.
Loot Table:
Battleborn Armbraces
Warmaster Legguards
Band of Rumination
Dragonrider Boots
Spaulders of Valor
Feralsurge Girdle
Eye of Rend
Faith Healer's Boots
Dal'Rend's Tribal Guardian
Dal'Rend's Sacred Charge
Blackhand Doomsaw
Felstriker
After Rend Blackhand you will be fighting The Beast. Be prepared before you even enter The Beast's room, he has a gigantic agro radius.
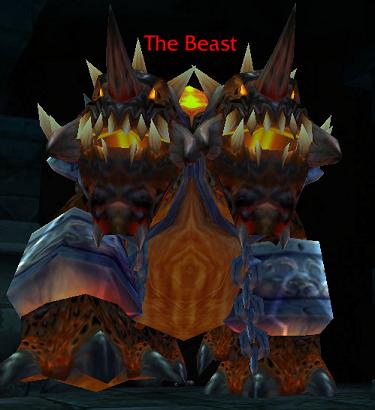
The Beast is a fairly unique encounter. He will use fire based spells against you and your group. He will also knock back the person highest on his threat far up into the air then charge to them when they land. The Beast will also fear players occasionally that are within 10 yards of him.
Loot Table:
Bloodmoon Cloak
Tristam Legguards
Spiritshroud Leggings
Frostweaver Cape
Blackmist Armguards
Lightforge Spaulders
Blademaster Leggings
Ironweave Boots
Seeping Willow
Book of Ferocious Bite V
Finkle's Skinner
Ace of Beasts
After you kill The Beast the next boss you will be up against will be General Drakkisath. General Drakkisath is the final boss of this instance.
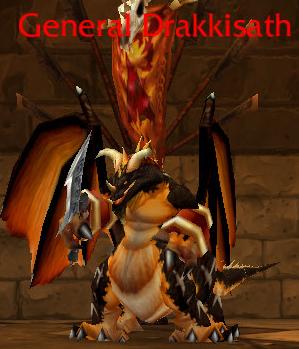
General Drakkisath is a very tough fight for groups this level and even people coming back to solo him at level 80. He comes with two adds which should be your first focus. After the adds are dead focus all your attention onto General Drakkisath himself. He has two abilities that will effect anyone of all levels, Conflagration and Pierce Armor. Conflagration deals 3000 damage over 10 seconds and will "fear" you.
During this fear you are completely vulnerable to attacks. Pierce armor is only feared because no matter how much armor you have it will be decreased by 75%. If you don't have any form of self preservation, heals or immunity etc etc a viable tactic may be to burn Drakkisath first so there is no chance he will use Conflagration.
Loot Table:
Tooth of Gnarr
Tome of the Lost
Spellweaver's Turban
Brigam Girdle
Painweaver Band
Shadow Prowler's Cloak
Draconian Deflector
Shadowcraft Tunic